I've had the chance lately to have several days that have had at least a pretty good amount of time free to work on stuff for the shop. I'm really much further behind on the whole "Whimsy Street Shopping District" project than I wanted to be by this point in the year...... My goal was/is to have the entire street done by December...... which would mean I should have had at least two of the shops completely done by now... so, not sure I'm going to have the whole street done by then, but we'll see. At the very least "Willow" and "Gallery B" will be done, and honestly I think the other shops after "Willow" will probably go quicker because I either already have a lot of the stuff I need for them or will be making most of it from scratch so therefor there won't be the time of waiting to be able to order things and then waiting for them to come. HAHA. On the flip side of that we're also heading into the time of year where there's tons of stuff going on for us, so I make no promises..... I sat down the other day and wrote out a list of everything that still needed to be done to finish both this shop and the Gallery, and while the list looks pretty long (a page and a few lines on the next for "Willow", for a start) a lot of it is stuff that should flow quickly one in to the other once I get all the details and accessories finished, so it's not really as much as it looks like. HAHA. But I digress, so back to what I've been up to in the Garden Shop.....
Mostly I've been working on accessories for the garden shop side of the store. And some of it so far has turned out even cuter than I was hoping for! All of the furniture and fixtures for the shop were purchased, either as 3D printed pieces (such as the counter on the Florist side) or as kits (the tiered shelves, hutch and plant stand), and a few of the items for sale were purchased as well (3D printed garden statues: a lion, a pagoda, and the birdbath, and the pitchers/watering cans and gardening tools, which were both kits), but the majority of the items for sale in the shop are either hand made or adapted from what their original intended use was. If you keep your eyes out for them and think creatively there are so many things that can be used for miniatures.... even in this small a scale. For this post I'll try to point out these items and mention the materials used/how they started out life, but I also plan on doing another post later to go into a little more detail about ideas for items that can be used and the techniques I used to turn them into their mini alter-egos.
 |
| So, the first things I did as far as dressing the store fixtures on the garden shop side of the store were to glue the pitcher with lilacs and the two empty pitchers, and a couple little terra cotta pots in place on the hutch. Next came painting and placing the open work "planters" (which started life as silver colored beads), originally I was going to put them both on the top shelf of this fixture, but I didn't like the way it looked so I put one up there and the other will sit next to the unit. I also attached the turquoise low planter (which is actually a bead cap). At this point I pretty much spent the rest of the evening of the day I did all this trying to decode what else I wanted to have in the shop for sale and put on the the hutch and shelving unit..... this is also the point that I started working on my list of what else I needed to make, get, and do to finish off the shop. |
 |
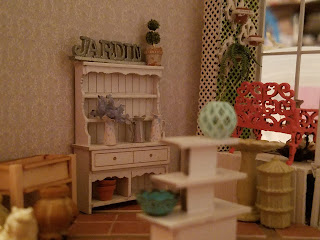
| And also while contemplating, I went ahead and just kind of set stuff in the store to see how it was looking so far.... and EEEE it's starting to really look like a store! |
 |
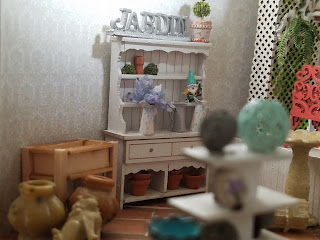
| the nest couple items to get made were a "Jardin" sign (made from little letter charms meant for a story locket) and a little topiary..... which I was SO excited about how it turned out! (P.S. the toe nail clippers are in the picture for scale.... also on a side note the work really well for gently cutting wire for mini projects) |
 |
| I was so excited about the topiary I had to get a close up. The pot it's in is actually half of a screw type jewelry closure, painted first with terra cotta colored craft paint and then a concrete color dry brushed over it, and the topiary itself is little tiny foam pellets (got them at Dollar tree last year at Christmas, they were meant to be used as snow, and i have used them for a bunch of different stuff) with a jewelry head pin stuck through them. I painted them dark green first then coated them with green ground foam. It seriously turned out even better than I had hoped for |
 |
| A shot of everything so far sitting in the shop |
 |
| In the meantime I decided that stepping stones would be a good thing to sell in the shop and would work well on the tiered shelving, and would be easy to make. I ended up doing two different techniques for them, some of them were made from small brads intended for scrapbooking, that I painted concrete color, and others are gray clay that I used the smallest of the round cake molds that I used to make the cakes for Flutterby Bakery to make.... I just only filled the mold about half way so they wouldn't be too thick. I still have a couple more to make/decorate, but the next few pictures are of the ones I've made so far..... this side has one made from a brad in the middle and a clay one with embedded tiny "stones" on the corner |
 |
| A better view of this side... This also is apparently the only good picture I got of the next few items on the hutch.... the "terra cotta" little statuette (which was cut from the end of a fancy toothpick and painted terra cotta) and a few boxwood/moss balls (made the same way I made the topiary, sans the head pin).... theres also a dome with some balls in it on the middle shelf in this picture (the dome is part of a pill capsule from Benadryl), but I haven't decided yet whether I actually want to use it on here anywhere. |
 |
| So back to the stepping stones.... this side has a brad stepping stone with flowers painted on it and a clay one with 2 butterflies carved in it. |
 |
| and then the last one I've made so far.... clay with a dragonfly carved in it |
 |
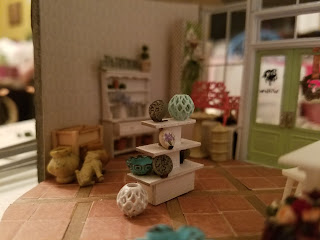
| Again just sitting it in the shop to see how it all looks... |
 |
| Now here we have the most recent addition to the hutch..... I actually was originally looking for a garden gnome charm bracelet charm because my friend Shanna and I (and her daughter) have a thing we call pocket gnomes, where we take mini garden gnomes with us when we do stuff and take pictures of our gnomes there....( it all started when after a LONG day driving from VA to FL this winter we were both exhausted and therefor getting silly/weird (-er than our normal lol) and she randomly starting singing "I've got a gnome in my pocket, got a gnome in my pocket".... and it just kind of developed from there.....), and in the process of looking for those I happened across a garden gnome floating locket charm so of course I immediately knew I had to order it for the shop. (Also ordered a couple versions of regular size charms for us to choose from for our charm bracelets, and to paint up and use in the shop as full sized garden gnomes) I forgot to get a picture of this little charm before I did anything to it, but it was originally silver colored metal. This picture was taken after spray painting it with a semi-flesh colored spray paint as both a primer and for his face and hands. |
 |
| And then came painting all the details.... it actually wasn't quite as difficult as I thought it might be lol. I did wear a pair of my husbands glasses though while I did it to magnify it a bit |
 |
| And then I quickly glued it in place on the hutch before I lost it.... HAHA. Oh look, and there is another good picture of the items on the upper shelf. I also had added pots to the other side of the bottom by this point. |
 |
| And again sitting in the shop |
 |
| Umm and apparently a picture zoomed in a little.... |
 |
| looking through the front.... |
 |
| These garden tools are another thing I bought as a kit for the shop. I knew i wanted to display them stuck in something in this plant stand and went through a lot of options in my head... at first I was thinking sand or "dirt" but then I thought, you know if I had a real life shop I wouldn't want that in my store, so instead I went with "marbles" (tiny no hole beads... the type they sell for nail art)...... the way I ended up doing it ended up with a really thick layer of glue in it, so technically I;m not 100% sure yet how it's turned out because it's going to take that glue a long time to actually dry, but so far so good.... |
 |
| Sitting in place in the shop |
 |
| There will be some larger garden tools leaning against the wall next to the plant stand, and there will be a piece of lattice on the wall above it with hanging decorations displayed on it. |
 |
| I also got a little something started for the florist side of the shop. The ribbons are actual super narrow ribbon and the "spools" are craft paper card stock punch with an 1/8 inch hole punch on a straight pin. |
 |
| I also made a little holder for it. I'm working on a second row of ribbons right now, but I probably won't make a shelf for that one, just the part to hold the "dowel" |


