Friday, November 18, 2016

Finally Getting Back To Work...

Well, it has certainly been a while since I've posted anything....... We had a super busy Fall (we took a trip to Gatlinburg, TN., had a Halloween party, actual Halloween, etc., etc.,) and it seemed like the season rushed from one thing to the next so quickly that I really didn't end up working on any dollhouse stuff for a couple months there.  But, December is rapidly approaching and so I've been focusing on getting the Backyard Art Studio and Flutterby Bakery finished.  The past couple weeks I've gotten a lot done, especially on the Backyard Art Studio...... at the same time I'm getting ready for our annual "Pre-Thanksgiving Dinner" and that's coming up this weekend, so as i take a break from trying to make the house at least semi presentable (haha) and getting everything ready for that I thought I'd post pictures of the progress on the dollhouses. :)

So, not the normal detail and attention I would give to posting each "step", but hey, it's the holidays right?!....... lol
getting all of the brick for the exterior painted

getting all the brick for the exterior painted

walls taped in place while the glue dries

walls taped in place while the glue dries

front view of the structure with the walls and doors in place

side view of the structure with the walls and doors in place

posts for the porch attached, and windows in place

posts for the porch attached and windows in place

posts for the porch attached and windows in place

inside view with walls up and windows in

put some of the furniture in place, including the easel I made

better view of the easel, with a canvas on it

the start of the first set of flowers I made for the landscaping

combining pieces of 2 different "bushes" I got from Hobby Lobby

waiting for the glue to dry.....

and finished product....... a peony bush with pre-bloomed peonies

checking out the skylights in place after my Hubster cut the openings for them for me

from the top

and from inside..... loving how they look!

I went back and forth on what color I was going to paint the ceiling..... I didn't want it white because that just would have been too much white, and I originally thought gloss black, but then I wasn't sure if the black would be too much so I thought maybe a charcoal gray, but then I thought "no, I don't want it to look half-hearted" so I decided to go back to the gloss black and see how it looked so I painted just one side to check it out.  And I loved it, so that's what it ended up being.

the other side with the ceiling painted

with both sides of the ceiling sitting in place. (I don't have all the ceiling braces in place yet in this picture)

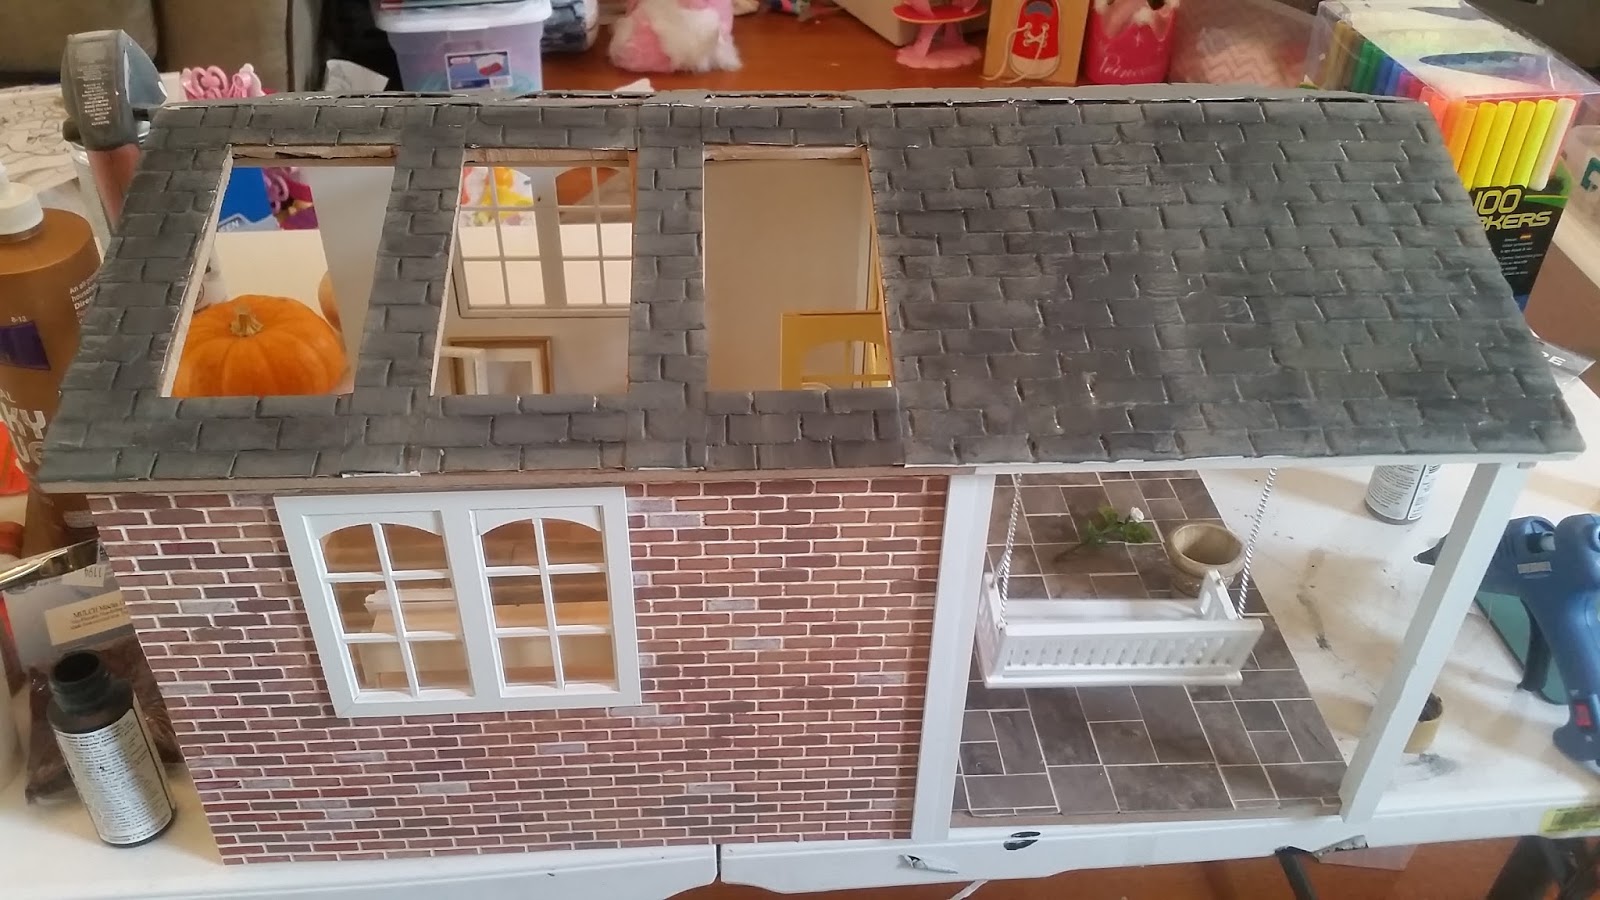
I forgot to take a picture before I started painting, but it the slate roof started out as a white plastic, then I painted it it a slate gray and then went over it with a combination of the gray and black.

roof painted

more shots of the ceiling with the braces and windows in place

more shots of the ceiling with the braces and windows in place

more shots of the ceiling with the braces and windows in place

more shots of the ceiling with the braces and windows in place

outside of the roof with the windows in place.  I also debatined a bit on the color for these, I thought about painting the outside gray to match the the roof a bit, like you would normally have in real life, but there wasn't really a way to do it that you didn't see some of the gray from the inside and it just didn't look as good as everything white, so back to white I went

side view

I still have to do the roof peak and a few trim pieces, but other than that the structure itself is finished..... so now on to the accessories and decorations

mini sketch book (complete with mini sketch) and pencil sitting on a pillow I made

sketchbook and pillows in place on the porch swing

sketchbook and pillows in place on the porch swing

sketchbook and pillows in place on the porch swing

Tuesday, September 13, 2016

{Flutterby Bakery} another cake.....

Well since I realized that it's been almost a month since I posted anything, and I have a few minutes before I'll be leaving for today's activities (a visit to a lovely wooded park that we have practically right around the corner from my house and lunch with a friend and her daughter), I thought I'd just post a few pictures of the last cake I finally figured out how to finish up for Flutterby bakery.
{it's the cake on the right top of the display case} 2 tier square cake with ombre fondant ruffles and a fondant flower on top


This was one of the first cakes I had planned out, and thought I could make the "fondant" ruffles from clay, but I just couldn't get it thin enough and small enough and not turn it into a disaster so I ended up putting it on hold until I could figure out how to make it work.  Then one day as I was reading instructions on making 1:12 scale flowers from crepe paper, suddenly it dawned on me to try using crepe paper...... and it worked beautifully! For the fondant ruffles I just cut tiny little strips of crepe paper and glued them around the cake ruffling them a little bit as I went and then kind of flaring the tops out a little after the glue was dry.  I used white crepe paper and used watercolors to get gradually darker shades of yellow.
a closer picture of the "fondant" ruffles on the cake, this was {obviously} before I did the flower on the top
The flower on top was just a few punched pieces of the crepe paper (a couple circles and a tiny little flower shape) that I shaped around the end of a small dowel that I sanded into a soft rounded point.

I love how it turned out!


one more picture, with a little bit more of the rest of the counter too.....


I'll probably be putting the bakery on hold for a little while though now and really focus on getting the Backyard Art Studio caught up to where I want to be with it by now.  There's really not a huge amount I have left to do before I can put the structure together and then it's not like there's a ton of furniture or stuff to make for the inside, it's mostly artwork and art supplies, but still it needs to be done by December, so that means I want to aim for it being done at least by the beginning of November (because we all know I'm going to be late getting it done than what I'm aiming for lol)

Sunday, August 14, 2016

{Flutterby Bakery} Chocolate and White Chocolate Dippsed Strawberries

Okay, so I did decide to go ahead and post specifically about making these little guys.
I'm not sure/don't remember what got me on the idea of having dipped strawberries in the bakery, I guess I was just looking for/thinking about other things beside the cakes and cupcakes that the bakery could be offering and somehow decided that it just had to be dipped strawberries.  Around the same time I watched a youtube video where someone made some 1:12 scale strawberries and it seemed to go pretty easily so I thought sure I can do that 75% smaller...... lol {keep in mind here that I don't really know what I'm doing so much working with clay, I'm just kind of figuring it out as I go along} after looking at a bunch of different images of real life dipped strawberries I realized that they typically still have stem on them (duh, to make it easier to dip and eat them) so I thought okay, I can use wire for the stem and also use it to hold the berries as I make them.  I still wasn't sure if there was anyway these were going to turn out at all, and/or how difficult they were going to be to make, but I bought some red clay and figured I'd give it a go.  When I was looking for the smallest gauge wire I could find, I realized I already had 26 gauge green floral wire, and I couldn't find anything really smaller than 26 gauge anyway so I decided to go with that.

So to start I rolled a teeny tiny ball out of a sliver of clay and pressed the end of a piece of floral wire into it and then pressing the other side of the ball to a soft point (when necessary, a lot of time just holding it while I pressed the wire into it formed it pretty well).  Then I laid them out on some parchment paper to bake.

I did realize at about this point that I wasn't sure how the coating on the floral wire would hold up in the oven, if it would melt or anything, but I went ahead and gave it a try (really hoping it would work since it is already green and everything). It ended up being fine.  Granted the clay doesn't bake at a very high temperature and they were only in there for 15 minutes, so I have no idea how it would work under different circumstances. Hotter or longer might be a problem.

After they came out of the oven and cooled off a bit, I moved on to adding the leaves.  I knew they needed to be pretty thin paper, but I thought tissue paper would be too thin so I colored both sides of a little piece of notebook paper with a green sharpie to use. Then I cut tiny little slivers, dipped the end in glue and stuck them around the stem of the strawberries.

At first I was holding each one until the glue dried, but then after the first one I realized that a foam ball with one side flattened (which I actually for some reason already had even lol) would hold them nicely while they dried

Once the glue on the leaves was dry I just dipped them in a tiny bit of brown or white paint using the extra long stem to hold them, and once the paint was dry (I laid them flat this time to dry so it didn't drip down the top of the strawberries or something) just clipped the wire to stem length with a pair of nail clippers and glued them into a pan.

So overall, what I thought was going to be a really difficult project that I wasn't even sure was going to work ended up being pretty easy (okay the leaves were pretty tedious to do, but not overly difficult) and turned out well.  I do think they may be ever so slightly bigger than they probably should be for this scale, but I don't think I could have made them any smaller, especially, the leaves, and I have seen some HUGE real life dipped strawberries so I think these are fine :)

{Flutterby Bakery} Cakes, Cupcakes, and Goodies, Oh My!

As promised, I didn't post each individual cake as I finished them lol.  But now I've gotten a bunch done (probably still have a few more cakes and maybe some other stuff to make though), and it's been a little while since my last post so I thought it was time to show them off!

There's not really much to say about them as a group, but just a couple of things to set the scene, so to speak.....

For one, I want to give credit where credit is due..... pretty much everything was made using molds and other supplies and materials from Stewartdollhousecreations.com . And I have to say, there is no way I would been successful in stocking this bakery without them!

Really the only other thing I would add about the group as a whole is that almost all of the designs were inspired by pins I saw in Pinterest.  Most of them are on my "bakery in a cake dollhouse" board, although there may have been some that I didn't end up pinning or that were already on my regular "cupcakes, cakes, and such" board and I didn't bother to repin to the bakery's board. If you want to take a look at the inspiration cakes/pins you can check out my boards by following this link: Bakery in a Cake Dollhouse or my Pinterest Profile

So..... here's a gallery of all the cakes, cupcakes, and goodies I've made so far.
I'm pretty sure this is the same picture I posted on the post about making this cake, but I figured I'd throw it in here again ;)

again pretty sure I already posted this one, but here it is again anyway.....
Mermaid themed cake with the tiniest real sea shell I could find on top

apparently I didn't take an individual picture of the purple 2 tier cake, but it was the next one I made, and I did take this picture of the first 4 together
this little one tier cake ended up being one of my favorites I've made so far
and so I made some matching cupcakes for it

a little bit closer look
I decided that this cake and it's matching cupcakes were perfect for one of the 2 tier pastry stands that I had for this project, and the light pink one was the perfect color to go with them

color/lighting isn't great on this shot, but so you can see it from a little bit of a downward angle too
Made a batch of chocolate cupcakes with chocolate icing and little purple flower decorations (I realized that I hadn't made anything chocolate yet for the bakery..... probably because I both don't like and can't eat chocolate - not without a migraine anyway- but of course since most people love chocolate, the bakery needs some chocolate stuff lol).  Then I put the chocolate and yellow rose cupcakes on their trays, and they posed for a picture with the first tray of cupcakes I made months ago.
and of course I had to set them in the display case and see what they looked like

super cute.... but I needed another batch of chocolate cupcakes for the bottom shelf

took a picture with a 2oz craft paint bottle sitting next to/behind the display for size reference.  Also I'm not sure that those 2 cakes will necessarily be what's under the counter there, but I put them there for pictures, just so that there was something there.  I'm about 99% sure that that's where the cake/cupcake display stand will be going though
my next edition was a little tray of tiny french macarons

you can see them a little better in this picture..... I dropped one of them trying to glue it to the tray and could not find it, so IDK if I'm going to make just one more, or leave it as is, like maybe they already sold one....
I worked on these teeny tiny chocolate and white chocolate strawberries, yesterday.  I was really unsure how these were going to work and turn out, but they actually went pretty easily.... I might even end up doing a post just about the strawberries, because I did take some pictures of the different steps in the process, but not sure yet lol
as tiny as these are I think they are maybe slightly big for the scale, but they are okay, and I have seen some HUGE real life dipped strawberries, so I think they work out...... plus it was hard enough cutting out little slivers of green paper and getting them glued on for leaves on this size, I think even slightly smaller would have been a no-go for that lol

not sure if that's where they are going to go or not, but they do fit in nicely there

they turned out so cute from the side view with them glued onto their tray!
and my other batch of chocolate cupcakes...... Oreo cupcakes..... chocolate cupcake with white frosting and an oreo cookie garnish.

I know the flash looks bad, but it was almost midnight last night so the lighting wasn't good to see the details without the flash, so the flash it was to show off the detials

I started this cake last night and finished it earlier today, and I think it may be my favorite so far.  It is a Chocolate Naked cake with scraped frosting and "fresh" flower decoration.

The flowers are dried Gypsophila (Baby's Breath) buds {carefully} painted the colors I needed and {carefully} glued in place, with a few tiny green paper leaves added.

I still have a few more cakes to make for sure and I have another display case like the one the cupcakes are in so I haven't decided exactly what's going in there so I might possibly be making some more cupcakes or something too (although I think I may just put a few smaller cakes in that one, but not sure yet)

I'm also not sure yet whether after I get the baked goods made if I'm going to take a break on the bakery and go back to the Art Studio right away, or if I want to just go ahead and completely finish the bakery first since I'll be so close.  I do have a list of when I want to have certain steps on the Art Studio done in order to make sure I have it done in time for the contest, so either way I will definitely be going back to that seriously soon.

Thursday, August 4, 2016

{Flutterby Bakery} Second Little Cake

I decided on a design and made the second little cake for the bakery last night.....
It is a 2 tier square modernish cake with an offset top tier and a "watercolor" flower design spanning both tiers on the front and one side of the cake.  This one wasn't really inspired by any specific cake that I saw.  I did see some cakes (both round and square) with the offset tier and I kind of liked the look of that for a slightly more "modern" cake and then a while ago (before I was even looking for mini cake ideas) I saw one with a large food safe watercolor stylized flower similar to this one on it that I really liked the look of, so I ended up kind of combining those two inspirations for this cake design.  I'm hoping to get a bunch more cakes done in the next few days. (but don't worry I'm not going to give each one its own individual post lol............)