Saturday, October 20, 2018

{Whimsy Street Shopping District Toy Store} A Few More Details While I Wait

Well, I suppose there's one good thing about this delay in being able to finish the toy store...... I'm getting some detail stuff done that I might not have bothered with otherwise.  Of course the other day I added some coloring pages to the outside of the checkout counter, and today I finished dressing the counter, and ended up going ahead with a few projects that I kind of thought I might not actually do for it. Originally I had a full size cash register for the shop and I had printed out some crayon and colored pencil box fronts, and wanted to have both of them on the shop counter, but I realized that with both of them on there they took up almost the entire counter, so I was kind of thinking maybe I just wouldn't do the crayons and colored pencils, but then the register still seemed kind of big so I thought hmmm..... maybe I can make a Square POS style register for it; but then I wasn't even totally sure I was going to bother doing that.  Today, though, since I still don't know when or if I'm getting the T-Rex charms (if I haven't gotten any updates on it by Tuesday I'm just going to order more), I was going to work on finishing off the check-out counter so I decided to go ahead and give the smaller, modern register idea a try.
the stand for the register is made from the tab from the back of a Dollar Tree frame that I pulled out of the back of the frame because I was using the frame for a different project.  It's probably a little wider than it should be, but there wasn't really any way to cut the width down (at least not without it being crazy difficult)

the tablet part is also a little too thick, but it was the thinnest wood I had at the time (well, or so I thought, actually found some that was a little thinner after it was completely finished and by then I wasn't going to remake it)


Even with some of the proportions a little off  I still think it worked out pretty well, and I was going to just leave it at that for the counter, but of course I just couldn't let the crayons and colored pencils idea go now that there was {probably} room for them so I made the little boxes of crayons and colored pencils (just glue a printed box front to some wood scraps and cut it to size and painted the sides and back), but then I couldn't really just have them sitting loose on the counter so I had to figure out how to make a little display for them.
the display for the crayons and colored pencils is made from cardstock.  I actually started by gluing the crayons to a piece for the base, then used a little scrap of wood to elevate the colored pencils and glued them down and then just kind of eyeballed the sides and cut them out and glued them onto the base and then glued on a front and back and then cut the base to the correct size
I also ended up painting it because some of the seams (especially where the sides met the base) where a little too prominent and the paint helped cover that a bit

For the shelf that is open to the front I had been kind of waiting 'til I got the last of the charms, because I thought I might want to use one in there, but I just really at this point want as much done without them as possible, and I had enough other stuff to use in there that I went ahead and finished that display without them.
the unicorn was a little bead from a bracelet, the light brite box was something I had had as an option for the open wall shelving, but ended up not using, so I stuck it in here, and then I had an extra coloring book that didn't end up getting put on the wall with the others and of course extra crayons and colored pencils


And, again, because I have some extra time to mess around with little details I put some plastic "bags" and paper "bags" in the bottom shelf that's open to the back to the counter.
the plastic "bags" are folded pieces cut from and actual plastic bag and the paper ones are just little pieces of folded pape
  So now All I have left to do is get those last few dinos in place once I get them and then glue everything in place.  I might actually glue almost everything in before then even though because I made sure that I made it so that the trunk can always open so I think I should be able to get the bookcase in though there if I have other stuff in the way from the back opening......

Thursday, October 18, 2018

{Whimsy Street Shopping District} - a little extra detail for the toy store while I wait for mail

Well, I'm still waiting for the little T-Rex floating charms I ordered (although at this point I'm thinking I may not get them and might have to order more, because the tracking for China Post says it has left China and the USPS tracking says they have a label for it but they haven't received the item yet....... and it's been in limbo between the two for quite a while, so I'll give it about another week and then reorder and do an expedited shipping rather than the free shipping. I feel like it being more of a priority will make it less likely to get lost lol).  In the meantime, as I'm sitting here looking at the shop, and everything that goes in it that I can't quite finish until I get the charms, I realized that the check-out counter was looking a little plainer than I was liking.  I didn't want to paint it because I wanted an even distribution of painted and unpainted fixtures in the store so that neither would look out of place, but especially as I was starting to set a few things on the open shelf on it to start to figure out what I'm putting on there (I was planning on having at least one of the dino charms on there, but now I'm kinda thinking maybe I'll just go ahead and use other stuff so it's done and whenever I get them there's literally only like 2 places I'll need to put them), I realized that it looked a little too plain on the outside with just being the plain wood.  Then it popped into my head to have some coloring sheets that looked like kids colored them displayed on the front and sides of the check-out counter.  And, as much as I hate to admit that I used MS Paint for anything, I would have had to get up and go to another room all the way at the other end of my house (which our house isn't that big I'm just being lazy and dramatic lol), and get on my old computer to use my Photoshop software, so........... lol.  But actually, Paint works pretty well for making pictures that look like a little kid colored them with crayons.  I probably could have got them to print out a little better if I had adjusted the resolution in Photoshop, but you know what, at this scale it's not like you're going to see a lot of detail either way, so I was satisfied with how these turned out.

{Sorry the pictures aren't great.... I just snapped them real quick to post on here and Facebook, I'll be getting better pictures of everything soon to do a post of the entire shop - either completed or completed except for those freaking T-Rex's lol}

So I guess, there's one good thing about my wait to see if I'm actually going to get those charms or not (which if I don't I'll get a refund for them so it's not a huge deal, plus they were only a few dollars anyway, it's more just that I hate waiting for stuff and now might have to start the wait all over again lol), it gave me the opportunity to add a little more detail to the shop, and added detail is never a bad thing!

Wednesday, October 10, 2018

Let's Take A Minute To Talk About....... Floating Charms

Floating charms..... story locket charms..... whichever you call them I really hope that the lockets they are designed for never go out of style.  If you're not sure what I'm talking about, these lockets are (usually) a round see through locket which you can fill with itty bitty little charms the represent your interests, or family, or a holiday, or pretty much anything you want.  The lockets themselves aren't huge so of course the little charms to go in them are extremely tiny.... most of them under a 1/4 inch tall... which makes them perfect for small accessories in a 1:48 scale miniature project, and I figured that while I'm waiting for a few of them to come in the mail to finish the toy shop I might as well share a little of how useful I have found them to be in my projects. I don't remember what first made me think to use them, I think somehow I came across them when I was looking for tiny (1/4 inch) mermaid figurines for my beach cottage project that I have been planning for a couple years now and will eventually actually get made.  I had seen the lockets before, but in our area there's not a huge selection of the charms available and they never made an impression on me as something useful for my projects, until mermaid floating charms showed up as results for this search.


Since then I've used them for quite a few different items.  After realizing that they could be useful I starting doing a little more looking into them and found out that they are readily available in tons of different designs, some of them pretty detailed. You can usually find shops on Etsy selling them individually for sometimes at low as $.50 up to a few dollars, or you can get packages of say 10 for a few dollars, either on Etsy (and I assume Ebay, although I have to say I've never actually looked for them on there), or from import sites like AliExpress.  (Both on Etsy and through import sites they tend to often come from China, especially if you are buying lots rather than individual charms). When you compare the prices, even with shipping, to what you might pay for something specifically made for quarter scale miniatures, they are a really good deal.  And that's assuming you'd even be able to find some of the items they represent sold for miniatures.  (Keep in mind that if they are coming from overseas and you don't pay for some sort of expedited shipping it can take a while for them to get to you - hence me waiting for the last ones I ordered to come in so I can finish off the last couple things in the toy shop lol)

They really work great for small accessories/decorative items/ toys to display on shelves in a miniatures project.  Keep in mind that they tend to be flat backed, so the detail/3d shaping will only be on one side.  This is why I say they're great for shelves, but depending on how you position them they might work for other places as well.  As I mentioned above, I got some mermaid floating charms to use as a little sculpture in Mermaid Cove Cottage (whenever I get to working on that...). They came as a lot of 10 though so I also used a few of them as mermaid dolls in the toy shop, and I plan on keeping at least one to use as an actual story locket charm (assuming I ever get around to getting the actual locket for it.....). 

Also in the toy shop I have toy horses that are floating charms, and toy dinosaurs that are floating charms (I'm waiting for T-rex charms to go with the Brontos)
I did have to bend the mermaids into a sitting position for them to fit, but it was surprisingly easy to do with a pair of pliers and a hammer
and I'm also waiting for some Russian doll charms as well a couple of which I'm planning on using in the toy store and one is for another project that will be part of someone's Christmas present.  Willow: Florist and Garden Shop got a floating charm as well in the form of a tiny garden gnome sitting on one of the shelves in the store.

Also on a kind of related note, while I'm talking about the garden shop from last year, I also used a few regular charm bracelet type charms for that as well...... the two larger garden gnomes in the store and the swan planter in the front window were originally bracelet charms.

  If you just cut or break the little ring they hang from off the top (you might also need to file it smooth where it was) and then paint them us however you want, and they make great larger items for quarter scale, or they would make great smaller items for larger scales..... and you can find a lot of them that are completely 3D (not flat backed) so they could be used in more visible places as well.


So, to re-cap, if you need a teeny tiny item for display somewhere consider seeing if you can find it in a floating charm (search for what you want + floating charm or story locket charm or you could even try floating story locket charm for example for the toys in the toy shop I searched for "horse floating charm".... I've found that floating charm tends to be the more common term used for them in listings, but sometimes it's good to try different wordings if you don't find something perfect the first go-around). There are just a few pros and cons though to keep in mind:

pros: -usually pretty detailed for their tiny size
look at the detail on these little horses
     
         - tend to be about 1/4 inch or less in height so they are 12 inches or less in height for 1:48 scale. (the measurements on listings tend to give the size in metric measurements, but my cell phone calculator has a converter, or you can just google it and it's easy to figure out what it is in inches if you need to)
        
        - pricing tends to be really good, especially compared to other items you might buy that are sold specifically for miniatures

cons: - they tend to be flat backed so probably need to be somewhere where only the front will be visible in the finished project
let's look at this picture again because you can see the back of one of the charms compared to the front
         
          - if ordering from an overseas seller there could be a long shipping time (so don't be like me and decide last minute you want a few more lol)
    
          - if you don't want them metal colored you'll have to paint them, which requires, a very fine point paintbrush (I've started using a rubber paintbrush that's shaped into a fine point, it's been working pretty well because I don't have to worry about the bristles separating and going where I don't want, but you do have to be a little careful because it's more likely to mess up paint that's already there since its a solid rubber tip), a steady had, either good eyesight or a magnifier (which I have really good eyesight, especially for tiny things and I used my husband's reading glasses when I was painting the gnome for the garden shop last year), and something sticky to hold it while you paint (I use a plastic putty knife with masking tape taped sticky side up to it).
the little garden gnome after I painted it.... I started with a coat of spray paint so that's why the putty knife and tape are all the same color, but you get the idea
  That is of course unless it's something that's going to be all one color in which case you just need a smallish brush or spray paint. lol (you should still put it on something sticky to hold it while you paint though)

Saturday, October 6, 2018

Long Time no See

Wow, I knew it had been a REALLY long time since I posted anything on here (this year has gone by crazy fast and had so much going on but I'll get in to that more in a minute), but I didn't realize that it's literally been since before Thanksgiving last year since I've posted anything! So I guess this post will be mostly getting everyone caught up to speed before moving on, haha.

So let's start with where I left off last year..... just before Thanksgiving, with the art gallery for my "Whimsy Street" project newly finished and gearing up for holidays and everything that goes with them.  Of course we had our annual "Pre-Thankgiving Dinner", and I think in a post last year I had mentioned re-doing the craft room, well, I did get the craft room re-arranged and my new workbench set up, but I have to admit almost a year later it's still in a semi--finished state because one thing I was planning on doing was opening the room back up to the back room in out house where my office is (long story but for a while we needed that part of the house to not be accessible through the craft room so there's currently bookcases covering the door), so I haven't finished painting or gotten everything exactly where it's supposed to be because in the mean time at some point that part of the house because out storage area and so now needs to be cleared out, and also I need a smaller desk in my office to get the door to be able to open, so I'm still not sure when that whole project will actually be completely done. But, to move onto the actual miniatures.....  I did get just started on the Toy Store at the end of last year, but then put it aside to work on Christmas presents and other projects, one of which was another miniature parade float,
figuring I'd get back to it at the start of the new year.  So, that brings us up to this year.

2018 so far:
 I suppose it shouldn't be surprising to me that I didn't actually post anything on here this year because the year flew by so fast and we had several major things going on that I ended up putting a lot of time into.  Honestly I didn't really work hardly any on the toy store (except for a little in January) until the past few weeks! I did however start the year working on some miniatures.  I was planning on making a big announcement once its all set up (which I still will), but at the end of last year I decided that I'm going to be opening an Etsy shop selling original miniature artwork, mostly in smaller scales, although there might be some larger scale items at times and of course some stuff will work for multiple scales.  The name of the business is/will be Gallery B Miniatures.
the shop logo
I had hoped to have it up and running in late March/early April time frame, but clearly that didn't happen. I vastly underestimated that time I would have available to get a good stock of artwork created before opening shop (although I did get a fair amount of paintings/artwork done early in the year I want to make sure that I have not only a good amount to post when I initially open shop but enough already ready to go to replenish the shop as items start to sell so that as I get new works finished I always have others already waiting so I never have nothing to post), I also wanted to do a lot of research on selling on Etsy and suggestions for shop policies, etc. and not just go in blind.  I was able to get a lot of research done early in the year, to the point that I'm confident enough that I'm probably as prepared on that front as I can be until I actually get into it.  My biggest problem as far as research and making decisions on policies and such has been trying to figure out shipping, let me just say the postal services website isn't always helpful. Haha.  So here it is October and the shop still isn't open, but at this point basically my hold up is getting more artwork finished and getting business permits and such, I'd say so hopefully by the end of the year, but in reality we're getting into the busy time of year for me, so I'm thinking more like early next year.

Now, you may at this point be asking yourself, "So, why didn't you get much work done this year either on artwork for the shop or on the toy store or bookstore?".  The answer to that basically starts at the beginning of March.  We actually took two full vacations this year, the first of which was at the beginning of March.  We went to visit some of my husbands family (2 sisters, a brother, and their families) in Arizona.  It was really an awesome trip, as well as getting to spend time with members of his family that we don't see very often we also took a couple days of the trip and took a side trip to the Grand Canyon! (his family is in the Phoenix area so the rest of our trip was there).  We stayed in the National Park (fortunately I was able to get a great deal on our room) and it was FABULOUS.
photo op at the visitor center

our first view of the canyon

I love this picture of my husband at the canyon

I wish I could post all the hundreds of pictures I took there, but then this post would never end, so I tried to pick just a few that I thought showed off the canyon the best.... you just really can't understand the effect of standing on the rim unless you have been there.... you just can't get the feeling of majesty and grandness and size through a photo
I have always wanted to go to the Grand Canyon, and it was even better than I was expecting.  It was a little chillier than it should have been at that time of year, but there was still some snow around and that was really cool.
you can see some snow in the bottom left portion of this picture
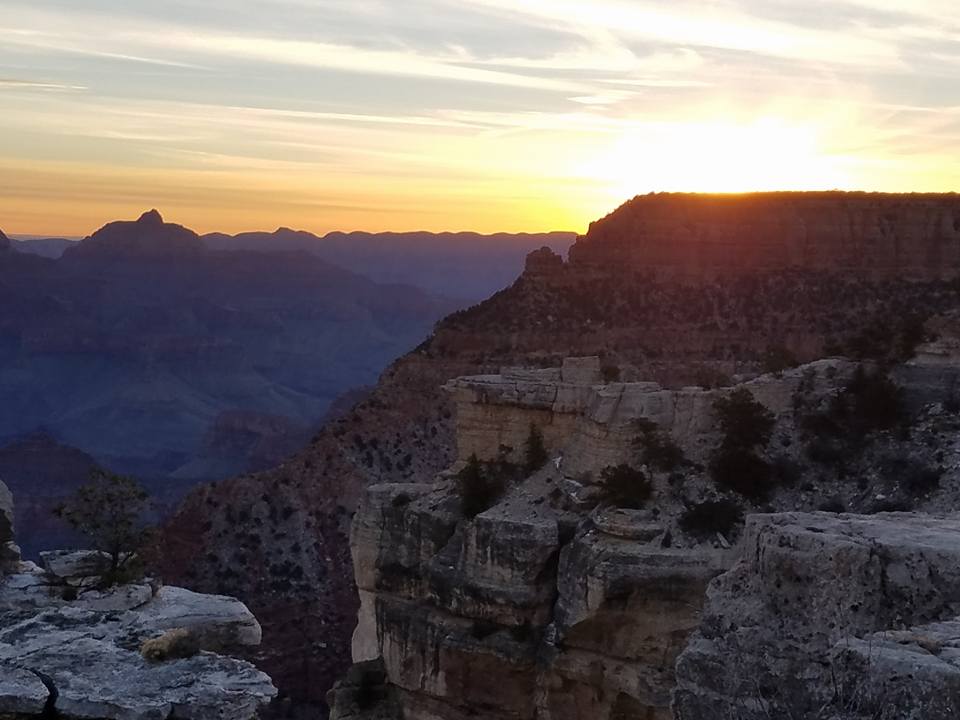
And the last morning we were there we got up early and watched the sun rise over the canyon..... neither of us were dressed quite warm enough for as cold as it was that early in the morning and we got a bit sick, but so, so worth it! I've always loved sunrises anyway but watching it come up over the canyon was just awesome.


Just a short way south of the Grand Canyon, there is a roadside attraction, which admittedly has seen better days, called Flinstone's Bedrock City (it's basically a recreated town of Bedrock). I love vintage roadside attractions (most of which have seen better days at this point lol) so we had to stop.  We ended up being the only people there while we were there (I'm asusming because of the time of year and it being a weekday) and we had so much fun running around taking pictures with the characters and houses.
you kind of know what your getting into as soon as you pull up hahaha.... but for $5 it was totally worth it (although I did find a $1 off coupon after we got home from the trip in a coupon/guide book I didn't really look though while we were there, so I wish I had because $4 each would have been even better haha)
we took a ton of photos, but I won't torture you with them all, but I liked this one of me and Dino and you can kind of see a couple of the structures in the background to get an idea of what the whole place was like.... the inside of the buildings were all decorated as whatever they were supposed to be too.  I loved it
We also stopped at another Park Service Site - Montezuma Castle National Monument - on the way back from the Grand Canyon (it's a small site that doesn't take long to visit, but it was really nice).
view of the cliff dwellings as we were walking along the path towards them, you don't go in them or on them here but there's a trail with several stops with informative signs that take you right under them and give all sorts of info. about them and other stuff on the site (and its a short, level walk) and there's really nice little museum in the visitor center as well
Later that week we visited the Desert Botanical Gardens in Phoenix,
me posing with one of the garden sculptures right after entering the gardens

walking down one of the paths through the gardens..... there were other areas that were more like a "garden" but there were also a lot of sections that felt like you were out roaming through the desert (but you know with paths haha) and I really like this picture ;)
and the Bass Pro Shop in Mesa (it's a thing we do, if there's a Bass Pro near anywhere we go we have to stop in and check out how its decorated).
the outside of the store

looking down the middle of the store after entering
     After getting back from the trip, I pretty quickly had to get working on Easter stuff, and then I had my birthday and had a party for that (a cacti and butterflies themed party.... did I mention there was a butterfly house at the Desert Botanical Gardens?.... can you guess my inspiration for the party theme?)
some of the bigger decoration on the food table in the bay window in my mom's dining room (we tend to have parties there, unless they are going to be outside because her house has a better set-up/flow for parties than our 1930's house lol)
the dessert buffet
and then a lot of days spent doing outdoors things in late spring/early summer. Our second trip of the year was in July to visit my husbands Dad in CA and his brother that he hadn't seen in 20+ years (and who I had never met in person) and his kids were there with us too (they live in TX).  We also went to Disneyland while we were there (my first time to Disneyland.... being on the east coast I've always been to Walt Disney World every other time I've gone to Disney, so I was super excited about that. Oh, did I mention that I had been sick just before this trip and still wasn't feeling great and was having breathing issues while we were there.... so let me say, my first reaction to Disneyland was how much smaller it is than Disney World, but I was really thankful for that because I don't think I would have made it through Magic Kingdom at Disney World hahaha.)
the whole park is smaller than Magic Kingdom in Disney World, but what really shocked me was how tiny the castle was compared to the castle at Disney World.  I'm not even that far away from it in this picture..... it's a super cute castle though!..... and I got my rose gold mouse ears that I really really wanted!
We didn't end up doing as much there as we would have had we both been feeling 100%, but we got in everything we really wanted to do and had a great time.  The next day we also went to Santa Barbara Pier with some of his family, but we headed up a little early and toured the Santa Barbara Mission before meeting up with everyone else for lunch at the pier.
Santa Barbara Mission from the front
inside the mission at the start of the area that you tour
standing near the end of the pier looking back towards the shore
since we got there really early (touring the mission didn't take nearly as long as we had allowed for it lol) we did a little souvenir shopping while we waited and also watch a bunch of sailboats heading out into the water
After getting back from that trip it took a few weeks to really recover from having been sick and having traveled while being sick and not really recovering in a normal time frame (and IDK what it was I had but it really affected my breathing, which was making it hard to do much of anything because I was having trouble getting enough oxygen).  So then it was a few weeks of trying to play catch up with stuff that had been not getting done while sick and out of state, and that pretty much brings us up to late August and when I really got working again on miniature stuff.

So, This post is already probably too long and most of it not really about miniatures even (although I hope you enjoyed some of our vacation pics and I really hope it inspires you to go to the Grand Canyon because I think everyone should go there at least once in their life!), so let me wrap it up with were I am with everything as of today.....  Etsy shop: at this point as I mentioned earlier, as much as I'd like to have it open before the end of the year, since my original goal was to have it open this year, I realize that that might not be doable and I'd rather have it wait until early next year and be done right than rush to get it done this year and not do everything the way I would like too (granted it would be nice to be open for holiday shopping, but probably not gonna happen) I did make a Facebook page for it though earlier in the year when I thought it wouldn't be much longer before I officially opened shop so if you like and follow it you can stay up to date with when it actually does open and special offers and such! (you can search for "Gallery B Miniatures" and the profile pic is the company logo)   Whimsy Street shops: The past few weeks I have really been working full steam on the toy shop (still haven't decided on a name though), and it is essentially done.  At this point I am just waiting on a couple little floating story locket charms I ordered to come in the mail and paint those up and glue them in place, then glue all the fixtures and everything in place and it's done (except for the name haha).  I will do a separate post just about the toy store though since there's a lot to cover since I haven't been posting as I go.  The bookstore should also be done before December, and as soon as I'm finished with toy store I will start really working hard core on that.... I've already gotten as few things started for it and I have everything I need for it (well at least that I know I need for it at this point lol) so I think it should go together relatively quickly.  If I don't get the last few pieces for the toy store sometime this week, I'll go ahead and get working on the bookstore "full time", but I also have some housework that needs to get done and I want to get my Halloween decorations up in my real life house this week, so this week I'm going to focus more on that stuff. haha.

I will post a post about the toy store by the end of the week either way, if the final items haven't come in yet to completely finish it off I'll still go ahead and show you what I have, and then I'll just do a short post later with the final pictures.  And then I should be back on track to post progress as I work on the bookstore (Which I think will be called The Librarian and The Bookworm Used Books, but I'm not 100% positive about that yet, my other top choice is The Bookworm's Burrow). And hopefully no more insanely long catch-up posts that have to cover basically an entire year.......... ;)