Thursday, December 6, 2018

Christmas Projects and winding down on the big projects for the year

This is the time of year where miniatures typically end up taking a bit of a back seat to other crafts and events going on for the holidays, and to a certain extent this year is no different, the Wee Christmas at Historic Kenmore exhibit that I'm involved in every year opened this past Sunday (it runs through the month, check out Kenmore.org or Facebook for more information if you are in the Fredericksburg area and are interested in going to see it.  This year I only have the toy store in it because I didn't end up getting the bookstore finished in time), I've gotten a bit more work done on the bookstore since my last post, but nothing too significant (I attached the two halves of the building together and have starting figuring out exactly how I want to do the windows. and then I made the floor for the first floor of the store, but I haven't actually even attached that down yet..... I also haven't really taken pictures of all that yet, so I'll give it it's own separate post sometime in the near future), and I'm moving on to Christmas projects.  This year though I have several Christmas themed miniatures I'm working on both for myself and for presents.

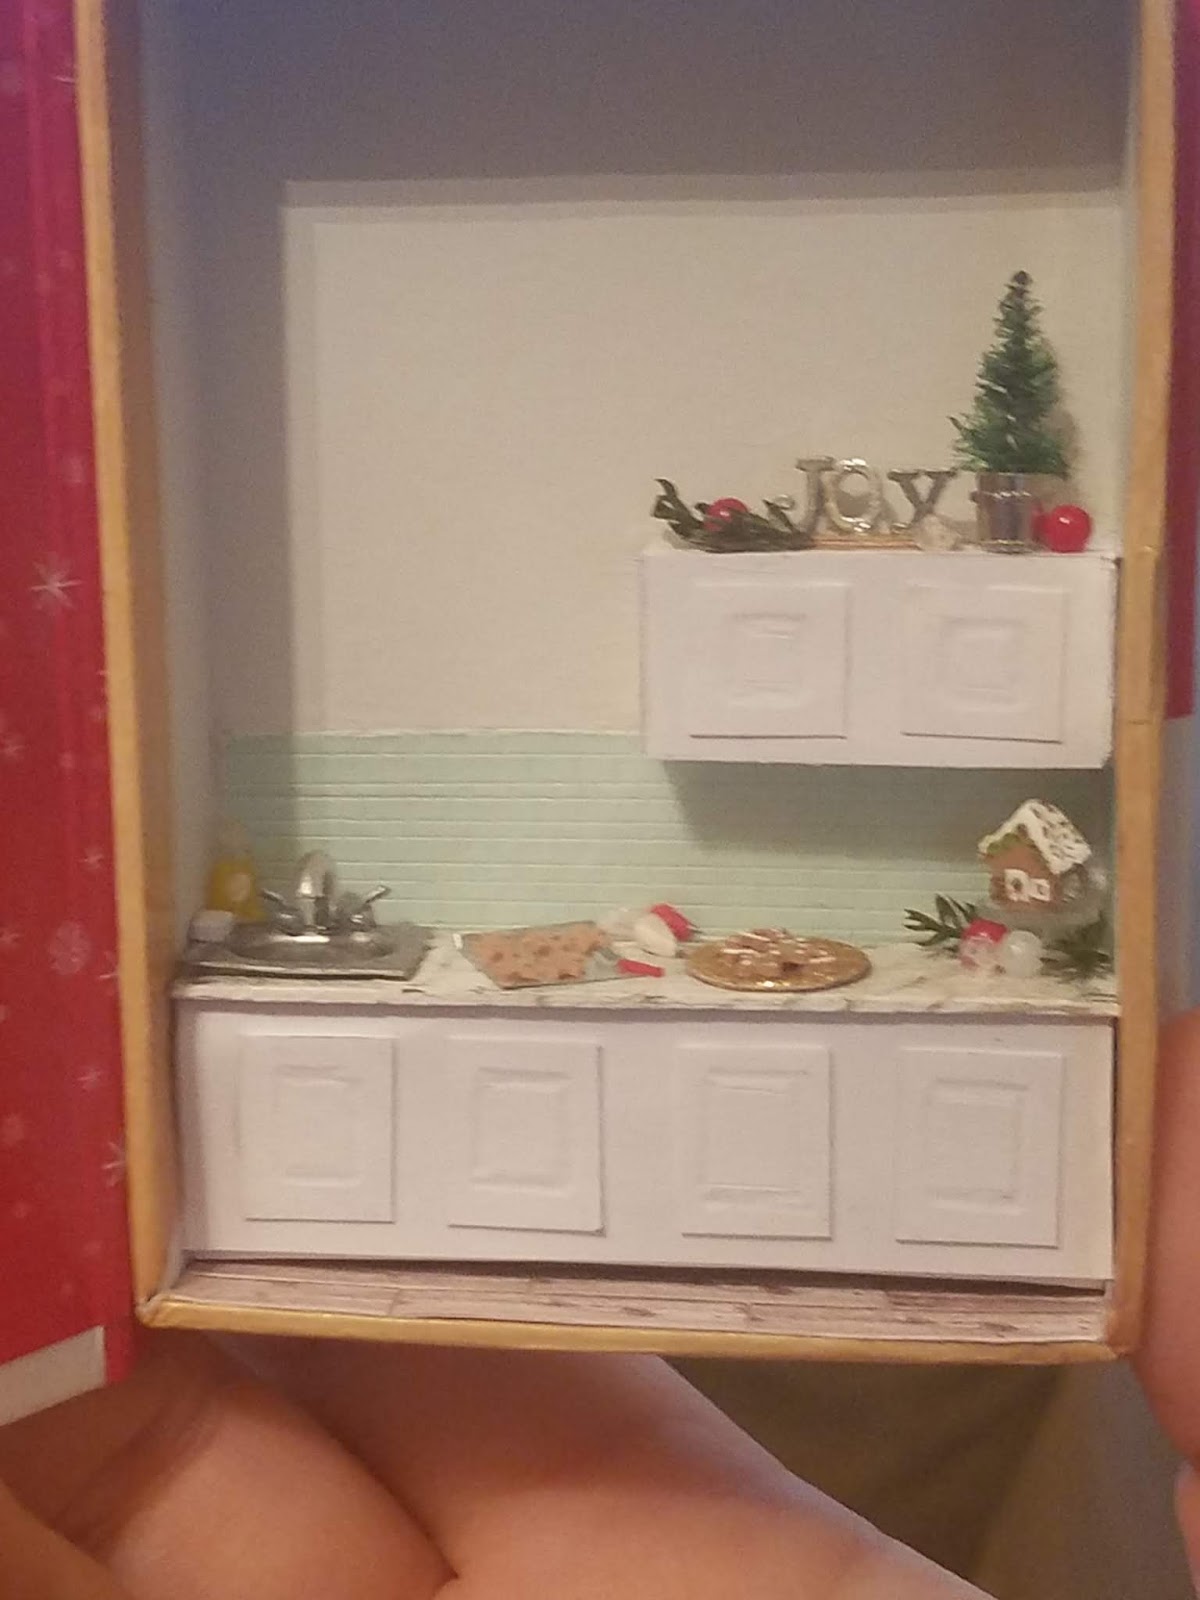
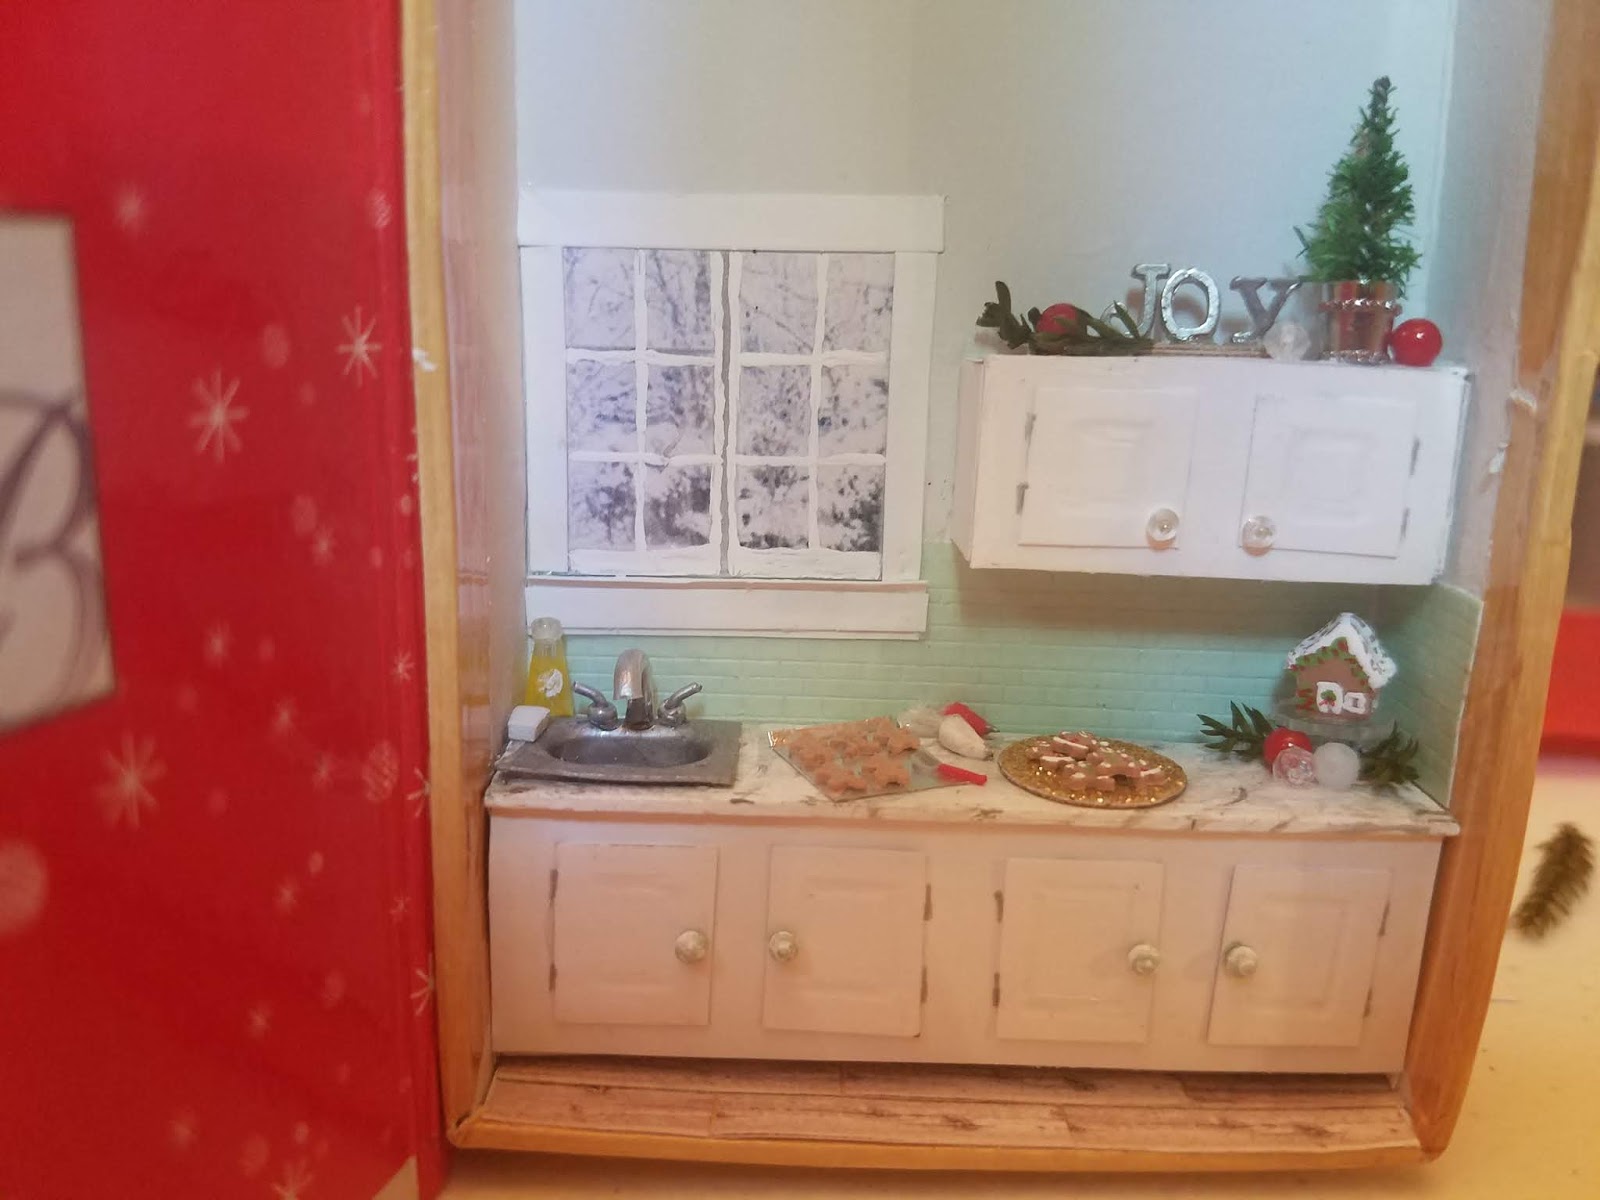
The first one I've finished should have been a one day project, not taking much more than the afternoon to finish, but of course me being me, I ended up dragging it out over about a week, because I kept adding stuff to it and hesitating to make decisions on exactly how I wanted to do a couple things for it.  I did finally put the last finishing touch on it yesterday though.  It is a 1:48 scale kitchen scene in a cute little gift card gift box that looks like a book.  They had them in several different cover designs, but for now I'm only going to show you this one because I might be using some of the others to make Christmas presents..... lol.  Since there was a gingerbread house on the cover of this one though I thought a little kitchen with a teeny tiny gingerbread house in it and gingerbread cookies being made would be perfect for it..... (fair warning the light in a lot of these pictures is pretty bad lol, since it was meant to be a quick little project I wasn't really thinking about needing great pictures, most of these were taken either mainly just for me to get a little more objective look at it, or to post a quick "this is what I'm doing right now" kind of thing on Facebook)
The front cover of the "book" (box). I also too a short video of the entire outside and it being opened that you'll see at the end of the pictures.... as long as I can figure out how to upload it on here.... I don't think I've ever tried doing a video on here before. lol
Early stages.  The cabinets are in but have no hardware so far, the tile backsplash is there, but I hadn't yet painted the walls above it, the counter is in and the sink, but the sink has no faucet or anything yet, and I'm just starting to decorate it

Basically the same as the last picture just slightly different angle.... fair warning, there may be several like that in here lol.

Getting a little bit further in the decorating.... top of the upper cabinets done too.  oh and you can't really tell in this picture but I had decided on and painted the upper part of the walls a super pale gray by this point too.

Close up of the cookies and decorating supplies..... The cookies were made using a fabulous mold from Stewart Dollhouse Creations, that even came with the clay.  The little spatula is from them as well (I bought the unpainted set and painted this one myself, the other pieces will be going in future projects).  The piping bags full of icing for decorating the cookies are little pieces of clay baked to harden and then just regular kitchen plastic wrap glued around them and the tip painted to look like a piping bag.  Oh, and the cookie sheet is just aluminum foil cut to size and then the one end folded up a bit. 

A better look at the cookies, and spatula, and icing bags

The kitchen of course had to have it's own little gingerbread house since that's what's on the front cover of the box.  This actually was - sort of - also made from a cake mold from Stewart Dollhouse Creations.... I used the square cake mold and put two layers together and cut the top to be angled like a roof and then just kind of pinched the bottom of that part to give it a little more shape. The cake stand it's sitting on was from them too!

Close up of the decorations on the tops of the upper cabinets..... the letters are floating locket charms, the tree is the top of a tiny bottle brush tree, cut off and shoved into half of a screw type jewelry closure that I removed the loop from, and the ornaments are just beads.  The springs of greens laying by themselves are tiny cuttings of preserved princess pine.

Finally got the sink finished.  The faucet is ust a bent piece of a large gauge wire and the handles are 11/0 seed beads with a little bent piece of narrow gauge wire in them and painted silver.  The dish soap I was really excited about because I really wanted dish soap, but wasn't sure how I was going to make that happen in Quarter scale, but fortunately I found perfect beads at Michael's (on sale at the time even), and i glued an 11/0 seed bead to the top and then painted the "soap" on with a little bit of light orange paint mixed with mod podge, to keep it translucent (and the right glossy finish to look like it was inside the bottle not on the outside lol), then I just dotted a small circle of white paint as a label, and it turned out so much better than I had hoped for even! Oh, and I think I forgot to mention what the sink itself is made from..... it's the blister packaging from my allergy pills cut to have a little lip around the blister part and painted metallic silver.

An overall view of the kitchen, with it mostly done.... I was still trying to decide what I wanted to do for hardware for the cabinet doors and what I wanted to do about a window at this point

An overall view of the whole kitchen after {finally} deciding on hardware for the cabinet doors

A closer view of the cabinet door handles on the bottom - they are made from 11/0 seed beads with a tiny no hole bead glued in the hole. they were then painted a color just slightly darker than the backsplash tiles, and then distressed with some white paint.  Oh I also think this is the first picture where you can really see the backsplash well.  I made it by gluing colored vellum to cardstock and then scoring the grout lines into it.  Have I mentioned yet that the cabinets are also cardstock? Which worked really well for the doors because I was able to emboss detail into them, but making the cabinets themselves from cardstock was a little more trouble than I really wanted lol. I choose cardstock so I wouldn't have to paint it and could just cut it with scissors, but I think next time I'm going to do them differently.

The upper cabinet knobs were made the same way as the lower cabinets, but instead of painting them they were left clear

And finally after dragging the project out for days, I got a window in the room.

Then decided I needed to paint the mullions instead of just the printed ones on the picture....

Then I decided it needed a little wreath (made from a piece of green pipecleaner I trimmed down so the fibers were really short, shaped with a pair of round nose pliers and then wrapped with 1/16th inch wide ribbon)

And finally I can call it finished!

The gift card holders/boxes I actually have seen at a couple different stores in my area this year (At Home, ACMoore, and I know I saw them at a 3rd store and I can't remember for sure where it was but I'm kind of thinking it was one of the Walmarts around here....) I got this box though at Dollar Tree.  It's a bit bigger (5.25" x 3.375" x 2.25" deep) and I'm planning on putting a Santa's Workshop scene in it.  I haven't really mapped it all out yet to see how it will fit, but I'm thinking a main level with shelving along the back wall and worktables in the center, with toys and presents being made and stored on that level and then a loft/second level with cubbyholes along the back wall and a desk (or maybe two) that will be the mail room/naughty and nice list headquarters..... I have some toys and supplies leftover from the toy store, that I want to use for something (a few of them went in my attic roombox that is for leftover materials from other projects, but I don't want to put everything I have more of in there) so this will be perfect to use some of that stuff!


Hopefully I will be getting that done before Christmas to post pictures of and I'm planning on doing a short post with some pictures of the little bit of progress I've made on the bookstore since last I posted, but, just in case the month gets away from me before any of that happens (as it often seems to do) I wish you all a very merry Christmas (or whatever other holidays you may be celebrating this time of year), and in case it really really gets away from me a Happy New Year too!

Friday, November 2, 2018

{Whimsy Street Shopping District} "The Librarian and The Bookworm Used Books"

Now that the toy store is finished (oh! BTW I finally came up with a name for it.... "The Toy Chest of Whimsy Street Toy Store"), I'm trying to really get going on the bookstore, and hopefully get it finished quickly (although I've got a busy November so fingers crossed). I had actually had a building started a while ago, but as I was working on the toy store and had what was originally going to be the building was sitting next to it at one point, I just started to think they looked to similarly shaped.  So.... I started over and ended up changing my design slightly and using two paper mache book shaped boxes, that I modified a bit to fit together to make one structure...... unfortunately I forgot to take pictures of them before I started messing with them, but they are the same as these books that I used for my Halloween decorations in my front hall (just ignore the mess on the stairs..... we are not good at keeping our stairs tidy lol), but smaller versions of them.
  After figuring out where the door and windows needed to be and cutting them out I added some strips of foam to the spines to give them a little more book detail.
  To give the covers more texture I mod podged on some tissue paper, letting it wrinkle some and not smoothing it out (although honestly after painting it I think it probably should have been a little less wrinkly than it is, but it'll be fine, if I really decide I want it a little less wrinkly, I can always sand it down/scrape it down a bit and repaint it).


As of tonight I've only got the two base coats of paint on one of the "books", tomorrow I might sponge a mix of the green and a tiny bit of black mixed/swirled to give it a little more leathery texture to it, but I'm not completely sure yet, I want to see it after being completely dry and in better lighting before I decide whether to actually do that step or not.
Why yes, yes I was watching Star Trek: The Next Generation while working on this one tonight lol.  Also, sorry for the bad picture, but the lighting in this room at night just isn't good for photography.
I'll also most likely paint the other "book" tomorrow too once the paint brush I want to use dries from washing the green paint out of it.

  Once I'm happy with the main color I'll be painting details with gold paint and the tops of the "pages" a white or off-white color.  Then I'll get the windows made and installed and the door painted and installed.  Then it's on to the inside.  I actually already put together the bar kit that I'm going to use as the front desk.
This is actually the side of it, I apparently haven't taken a picture of it from the front yet, but honestly it's been a long week and i just don't feel like taking another picture of it right now.... it's a curved bar/counter..... and there will be many many more pictures posted of it shortly I'm sure
And I've already taken the 3-d printed stairs I ordered out and semi test fitted them so that I knew where the second floor would be. They are going to look so good once I get them painted and they are installed in the shop!

  So, I think that's about it for now, hopefully I will have a finished structure to show soon, and then moving on to the inside!

Tuesday, October 23, 2018

{Whimsy Street Shopping District Toy Store} IT'S DONE, IT'S DONE!!!!

Finishing this particular project was really a long time coming.  Technically I started working on it back in December, and got going pretty good on the building itself, inside and out, and then it got put aside and then most of this year I didn't get hardly anything done.  Then sometime in September I started working on it again hardcore, and got a lot done in a pretty short amount of time, but then I got delayed again while waiting for T-Rex floating charms to arrive from China, but now it is finally completely done! (well actually there's one more thing I might do..... if I ever come up with an actual name for it I'll make a sign for the shop to hang on the outside.  I've also considered trying to make some little balloons for outside, but if I end up making a sign I don't know if I would want the sign and balloons - I think it might be too much with what's already there).  So rather than go on and on about it, I'm just going to post the photos and talk about each area as I go.  Most of the stuff in there I have already posted about in earlier posts, so some of it might be repeating if you read those posts, but I'll try to at least be to the point and concise (bahahahah, hey, I said try lol)
Front view of the finished shop.  As I said, I still haven't come across the perfect name for the store, but honestly, since it says "Toys" real big across the top, I don't think it'll be the end of the world if I don't have an actual name and sign for it.  The lettering for the word "toys" are some glittery red stickers I already had that I backed with white paper and glued to the trunk.  The Trim around the windows and doors is Balsa wood that I soaked and then formed around the curve of the building until it dried and then glued on.  The door I purchased and painted, and the steps are floral foam, cut and painted to look like concrete steps.  The "giant" toy soldier was a little figurine I bought, I think around Christmas last year.  Oh and I suppose I almost forgot the most important part..... the building itself is a little chest I purchased at Hobby Lobby.


The castle and dragon in the window display were purchased as is.  I made the platform they are sitting on and painted the "road" up to the castle and he's kind of hard to see in this picture, but there's a little toy knight between the castle and dragon that I made from the top of a fancy toothpick.  The "Play" banner I made from masking tape and ribbon and the clouds are tiny pom poms that I pulled apart and "fluffed" a bit.

The dollhouse in the window display on the other side of the store I handmade from basswood.  The carousel horse was originally a mini Christmas ornament and I made and attached a base to it and painted it. The doll sitting on the horse I made from the top of a fancy toothpick and tissue paper and paint for the dress and little pieces of curled thread for the hair.  I also made the "giant" tissue paper flowers. The "imagine" bunting is little pieces of glitter tape with the letters painted on them.
I made sure when I was decorating the inside that I worked it out so that it could still be opened even after it was finished.  It made/makes it much easier to place stuff in the shop (or repair stuff if the need ever arises), and also made it easier to take closer pictures of certain parts of the shop
view of the inside of the shop. The green parts of the walls are painted and the cloud "wallpaper" is scrapbook paper.  The kites hanging from the ceiling are made from tissue paper and thread.  (The trim of course is painted stripwood)

I made the display tree that the dress-up wings and shields are hanging on from a toothpick and little pieces of wire.  The wings themselves are punched from velum and decorated with paint and glitter, and their "straps" are embroidery floss.  The knight's shields are cut from cardstock and they are hanging from packaging made from masking tape.  The little train table was a kit I purchased and assembled/painted

The dress-up capes are cut from satin and hanging on hangers I made from wire.  The dress-up tutus are made from tissue paper and hung from more hangers I made from wire.  They are all hanging from a fixture I made from basswood and wire.  The letters on the wall are floating locket charms I bought at Hobby Lobby.

I made the center display tables from little wood circles and strips of scrapbook paper.

The elephant and giraffe in the centers of the tables I made from purchased kits.  The blocks on the table that's on the left in this picture are little pieces of square dowels I painted, the little toy car I made from the square dowel also, carved and painted.  The crayon box it a printed front glued to a little piece of wood painted to match, and the drum is a scrapbook paper covered dowel with sewing pins cut to size for the drum sticks.  On the table on the right, the turtle toy is a bead, the little doll leaning against it on the left is made from the tip of a toothpick and the baby rattle next to it is made from a sewing pin and a seed bead.  The play ball is the head of a pearl head pin.

On the other side of the tables, on the table on the left, there's another toy car carved from square dowel, A Russian doll floating charm I painted, baby toys made from the heads of decorative jewelry head pins and painted, and a Robot I made from pieces of square dowel, some wire and silver paint.  The stuffed bunny on the other table I made from clay, and there's some more wooden blocks and baby toys made from the heads of fancy jewelry head pins
The shelving unit on the wall I made myself from basswood, and most of the boxes on it are printed covers glued to little scraps of wood.  The checkout counter I assembled from a kit and decorated (I'll talk about the decorations in a more close up picture)
The pictures hung all over the counter are colored and printed out to look like kids colored them with crayons.  The register I made to look like a "square" style register, the tablet part is wood and the stand part is made from the tab from the back of a dollar store frame that I had pulled out of the frame because I was using the frame for something else, not as a frame.  Also on the counter is a display of crayons and colored pencils.  They are printed box fronts glued to small pieces of wood painted to match and the display unit I made from cardstock.  On display on the shelf is a Lite Bright box, a coloring book, more crayons and colored pencils, and a little unicorn toy (which started life as a bead). The boxed dollhouse kits throughout the store where made from a purchased kit.


You can't see it real well in this picture, but the bottom shelf in the back of the counter had folded plastic and paper "bags"

You can see the shelving unit and boxed toys and games better in this picture, and the bin full of playground balls is made from a tiny wood disk and scrapbook paper and the balls themselves are the head of pearl head sewing pins.

The platforms that the window displays are sitting on are wood covered with scrapbook paper

The bookcase I assembled from a purchased kit. The horses, dinosaurs, and mermaid dolls on the shelve are floating locket charms I painted, the toy knights are made from the top of fancy toothpicks, the dolls are also made from the top of the same toothpicks with tissue paper for this dresses.  The whale was a bead, the teddy bears I made from tiny pom poms.  The starfish/flowers/whatever you want them to be on the top shelf of the far side are stickers, the octopus toy I made from a tiny pom pom and scrapbooking baker's thread, and the baby toys are the heads of fancy jewelry head pins, cut off and painted.  The castle on top was an unfinished metal piece I bought and painted.  The train set box I printed out and glued to a piece of wood and the rack it's sitting in I made from wire.  The train play mats under it are printed and I made the container they are in from basswood.

The coloring book are printed and the shelving units they are sitting in are pieces of plastic u-beam that I had leftover from another project


And now that the toy store is finally completely finished it's time to move on to the bookstore in earnest.  I've already gotten started on it some but hadn't gotten too into it while I still had stuff outstanding on the toy store, but now that the bookstore is all I have to work on at this point, I'm hoping I can get it done pretty quickly.  Fingers crossed. haha.

{Whimsy Street Shopping Distric Toy Store} One more detail while I......... wait?

Yesterday as I was looking at the outside of the toy store, after going ahead and gluing everything in place in the store (except for the bookcase that I can't finish dressing/stocking without the T-Rex charms), I realized that I needed a couple steps to get up to the front door, so I set to work figuring out the easiest/best way to make them.  My hold up was that there's a rounded trim around the bottom of the the outside and I needed whatever I made the steps out of to at least somewhat mold around it.  I had thought about making steps out of clay, but I wanted the steps to look like concrete and don't have any gray clay, which would mean I would have either had to mix some black and white (which is what I usually do) but then I'd have to square it off after, or I'd have to make them white and then paint them....  And honestly I wasn't sure how well I would do pressing the curve into the back of them without pressing my finger into the front (I'm not always the greatest with clay bahahaha).  As I was thinking about what else I could use I realized I had a little piece of floral foam floating around that was too small to actually use for florals so I decided to give it a try.
It was really easy to cut and shape (well except I cut the top of the first one a little crooked, but it was really quick to make another one that was more even).
My only real concern is that floral foam is so soft and I wasn't sure if it would be sturdy enough to hold up to being on the outside of the building.  I obviously was going to have to paint it anyway though, so I thought that might make the outside of it a little harder.  After two coats of gray paint it looked great, really ended up looking like concrete, with the texture of the foam and it was a bit harder on the outside,

so I decided to try coating it with matte Mod Podge and that seems to have given it a little more toughness at least on the surface so I think I'm going to go ahead and use them because they look so good and just try to be extra careful with the front of the shop. hahaha.

Yesterday I also gave up waiting for the T-Rex charms to actually make it here and went ahead and ordered a couple from a seller on Etsy.  Which I was originally going to wait until today to order more, but they only had two left and I actually wanted at least 3 so I didn't want to risk someone else buying one or both of them.  Of course, anyone want to take a guess what came in the mail today???? BAHAHAHAHAHAHA.....
Oh well, it was only a few extra dollars that I didn't actually need to spend so not a huge loss.  So, as of right now, I'm waiting for the paint on the charms to dry so I can glue them in place on their shelf, and waiting for the last coat of Mod Podge to dry on the steps (I didn't have any Matte so I had to wait until I could run to the store this morning to finish the steps) and then take a few pictures of the bookcase before I glue it in place in the shop and then glue it and the front steps in place and one other thing on the front of the shop and then the shop will be done and I can take pictures and post them! So, maybe tonight, or if not hopefully sometime tomorrow I should have photos taken and posted!