Sunday, August 14, 2016

{Flutterby Bakery} Chocolate and White Chocolate Dippsed Strawberries

Okay, so I did decide to go ahead and post specifically about making these little guys.
I'm not sure/don't remember what got me on the idea of having dipped strawberries in the bakery, I guess I was just looking for/thinking about other things beside the cakes and cupcakes that the bakery could be offering and somehow decided that it just had to be dipped strawberries.  Around the same time I watched a youtube video where someone made some 1:12 scale strawberries and it seemed to go pretty easily so I thought sure I can do that 75% smaller...... lol {keep in mind here that I don't really know what I'm doing so much working with clay, I'm just kind of figuring it out as I go along} after looking at a bunch of different images of real life dipped strawberries I realized that they typically still have stem on them (duh, to make it easier to dip and eat them) so I thought okay, I can use wire for the stem and also use it to hold the berries as I make them.  I still wasn't sure if there was anyway these were going to turn out at all, and/or how difficult they were going to be to make, but I bought some red clay and figured I'd give it a go.  When I was looking for the smallest gauge wire I could find, I realized I already had 26 gauge green floral wire, and I couldn't find anything really smaller than 26 gauge anyway so I decided to go with that.

So to start I rolled a teeny tiny ball out of a sliver of clay and pressed the end of a piece of floral wire into it and then pressing the other side of the ball to a soft point (when necessary, a lot of time just holding it while I pressed the wire into it formed it pretty well).  Then I laid them out on some parchment paper to bake.

I did realize at about this point that I wasn't sure how the coating on the floral wire would hold up in the oven, if it would melt or anything, but I went ahead and gave it a try (really hoping it would work since it is already green and everything). It ended up being fine.  Granted the clay doesn't bake at a very high temperature and they were only in there for 15 minutes, so I have no idea how it would work under different circumstances. Hotter or longer might be a problem.

After they came out of the oven and cooled off a bit, I moved on to adding the leaves.  I knew they needed to be pretty thin paper, but I thought tissue paper would be too thin so I colored both sides of a little piece of notebook paper with a green sharpie to use. Then I cut tiny little slivers, dipped the end in glue and stuck them around the stem of the strawberries.

At first I was holding each one until the glue dried, but then after the first one I realized that a foam ball with one side flattened (which I actually for some reason already had even lol) would hold them nicely while they dried

Once the glue on the leaves was dry I just dipped them in a tiny bit of brown or white paint using the extra long stem to hold them, and once the paint was dry (I laid them flat this time to dry so it didn't drip down the top of the strawberries or something) just clipped the wire to stem length with a pair of nail clippers and glued them into a pan.

So overall, what I thought was going to be a really difficult project that I wasn't even sure was going to work ended up being pretty easy (okay the leaves were pretty tedious to do, but not overly difficult) and turned out well.  I do think they may be ever so slightly bigger than they probably should be for this scale, but I don't think I could have made them any smaller, especially, the leaves, and I have seen some HUGE real life dipped strawberries so I think these are fine :)

{Flutterby Bakery} Cakes, Cupcakes, and Goodies, Oh My!

As promised, I didn't post each individual cake as I finished them lol.  But now I've gotten a bunch done (probably still have a few more cakes and maybe some other stuff to make though), and it's been a little while since my last post so I thought it was time to show them off!

There's not really much to say about them as a group, but just a couple of things to set the scene, so to speak.....

For one, I want to give credit where credit is due..... pretty much everything was made using molds and other supplies and materials from Stewartdollhousecreations.com . And I have to say, there is no way I would been successful in stocking this bakery without them!

Really the only other thing I would add about the group as a whole is that almost all of the designs were inspired by pins I saw in Pinterest.  Most of them are on my "bakery in a cake dollhouse" board, although there may have been some that I didn't end up pinning or that were already on my regular "cupcakes, cakes, and such" board and I didn't bother to repin to the bakery's board. If you want to take a look at the inspiration cakes/pins you can check out my boards by following this link: Bakery in a Cake Dollhouse or my Pinterest Profile

So..... here's a gallery of all the cakes, cupcakes, and goodies I've made so far.
I'm pretty sure this is the same picture I posted on the post about making this cake, but I figured I'd throw it in here again ;)

again pretty sure I already posted this one, but here it is again anyway.....
Mermaid themed cake with the tiniest real sea shell I could find on top

apparently I didn't take an individual picture of the purple 2 tier cake, but it was the next one I made, and I did take this picture of the first 4 together
this little one tier cake ended up being one of my favorites I've made so far
and so I made some matching cupcakes for it

a little bit closer look
I decided that this cake and it's matching cupcakes were perfect for one of the 2 tier pastry stands that I had for this project, and the light pink one was the perfect color to go with them

color/lighting isn't great on this shot, but so you can see it from a little bit of a downward angle too
Made a batch of chocolate cupcakes with chocolate icing and little purple flower decorations (I realized that I hadn't made anything chocolate yet for the bakery..... probably because I both don't like and can't eat chocolate - not without a migraine anyway- but of course since most people love chocolate, the bakery needs some chocolate stuff lol).  Then I put the chocolate and yellow rose cupcakes on their trays, and they posed for a picture with the first tray of cupcakes I made months ago.
and of course I had to set them in the display case and see what they looked like

super cute.... but I needed another batch of chocolate cupcakes for the bottom shelf

took a picture with a 2oz craft paint bottle sitting next to/behind the display for size reference.  Also I'm not sure that those 2 cakes will necessarily be what's under the counter there, but I put them there for pictures, just so that there was something there.  I'm about 99% sure that that's where the cake/cupcake display stand will be going though
my next edition was a little tray of tiny french macarons

you can see them a little better in this picture..... I dropped one of them trying to glue it to the tray and could not find it, so IDK if I'm going to make just one more, or leave it as is, like maybe they already sold one....
I worked on these teeny tiny chocolate and white chocolate strawberries, yesterday.  I was really unsure how these were going to work and turn out, but they actually went pretty easily.... I might even end up doing a post just about the strawberries, because I did take some pictures of the different steps in the process, but not sure yet lol
as tiny as these are I think they are maybe slightly big for the scale, but they are okay, and I have seen some HUGE real life dipped strawberries, so I think they work out...... plus it was hard enough cutting out little slivers of green paper and getting them glued on for leaves on this size, I think even slightly smaller would have been a no-go for that lol

not sure if that's where they are going to go or not, but they do fit in nicely there

they turned out so cute from the side view with them glued onto their tray!
and my other batch of chocolate cupcakes...... Oreo cupcakes..... chocolate cupcake with white frosting and an oreo cookie garnish.

I know the flash looks bad, but it was almost midnight last night so the lighting wasn't good to see the details without the flash, so the flash it was to show off the detials

I started this cake last night and finished it earlier today, and I think it may be my favorite so far.  It is a Chocolate Naked cake with scraped frosting and "fresh" flower decoration.

The flowers are dried Gypsophila (Baby's Breath) buds {carefully} painted the colors I needed and {carefully} glued in place, with a few tiny green paper leaves added.

I still have a few more cakes to make for sure and I have another display case like the one the cupcakes are in so I haven't decided exactly what's going in there so I might possibly be making some more cupcakes or something too (although I think I may just put a few smaller cakes in that one, but not sure yet)

I'm also not sure yet whether after I get the baked goods made if I'm going to take a break on the bakery and go back to the Art Studio right away, or if I want to just go ahead and completely finish the bakery first since I'll be so close.  I do have a list of when I want to have certain steps on the Art Studio done in order to make sure I have it done in time for the contest, so either way I will definitely be going back to that seriously soon.

Thursday, August 4, 2016

{Flutterby Bakery} Second Little Cake

I decided on a design and made the second little cake for the bakery last night.....
It is a 2 tier square modernish cake with an offset top tier and a "watercolor" flower design spanning both tiers on the front and one side of the cake.  This one wasn't really inspired by any specific cake that I saw.  I did see some cakes (both round and square) with the offset tier and I kind of liked the look of that for a slightly more "modern" cake and then a while ago (before I was even looking for mini cake ideas) I saw one with a large food safe watercolor stylized flower similar to this one on it that I really liked the look of, so I ended up kind of combining those two inspirations for this cake design.  I'm hoping to get a bunch more cakes done in the next few days. (but don't worry I'm not going to give each one its own individual post lol............)

Wednesday, August 3, 2016

{Flutterby Bakery} Got some goodies in the mail, and made my first cake!

While I was at work yesterday my latest order for the bakery - a mold to make cakes and a "star tip" for doing icing in 1:48 scale from Stewart Dollhouse Creations -  arrived in my mail (I actually stopped by the house real quick as I was moving some merchandise from one of our sites to the other since I'm only 2 blocks from the one because I knew it should be there and couldn't wait to open it up!). The last batch of cupcakes I "baked" were waiting for the star tip so that I could do the frosting in rosettes and of course I've got a bunch of cakes to make for the bakery as well.  While I did make a few baked goods for the North Pole Tea Room, I hadn't done anything as involved or detailed as whole 1:48 scale cakes.  Of course, me being me, I didn't want just nice plain pretty colored cakes.... oh no, I pinned cakes with fondant decorations and fancy piping and all sorts of stuff.  I did try to be a little realistic in what I thought was even conceivably possible for me to do in that small of a scale, but even at that apparently I have high expectations for myself.......  Having said that, being the stubborn headed crafter that I am, I decided to do the most difficult one as my very first cake.  In the long run, I'm kind of glad that I did because now they should be much easier and less frustrating to make (so I think anyway...... we'll see......). This particular cake was a 2 tier round cake with fondant  pink rose petals covering the bottom tier and the upper tier white frosting with white curly cues piped onto it and a pink fondant flower set to one side at the top edge.  So of course that meant making teeny tiny "fondant" petals out of clay (which I should probably preface all of this by saying I've worked with clay a little bit before but not much.). Seemed easy enough in theory, however in practice it became a lot more frustrating than I thought it might be.  In the end I ended up making the petals a bit bigger compared to the overall cake size than in the picture of the real life cake I was modeling it after, but I'm still happy with how it turned out.  I went through several different trials and errors before I finally figured out how to make it work...... my initial idea about how to do it was to form the little petals then bake them, and then glue them to the pre-baked cake form.  I was having a horrible time getting these tiny thin pieces of clay from the mat that I was forming them on to a piece of baking parchment to bake them without destroying them.  So then I thought maybe I can form them directly onto the cake and then bake them in place, I figured those few extra minutes wouldn't hurt the cake.... but then that did not work at all either trying to get them to look right forming them on the cake.  Finally I figured out that if I used the bottom of one of the molds I have I could form them and bake them on the same surface and then glue them to the cake.
  This is what I ended up doing for the final product, but even that took a little bit of figuring out how best to get them formed just right (and also to accept that if I wanted to not go crazy I was going to have to settle for fewer, bigger petals lol).

  The original cake also had the petals smoothed over the top edge and covering the top of the bottom tier as well, but I knew that wasn't going to successfully happen here so I just painted the top the same light pink as the petals. Then it was on to the top tier.  I wasn't too concerned about piping the curly cues..... I'd already had some practice with the syringes for the mini baked goods and of course tons of experience piping real life frosting designs.... and that went easily, as I expected, but then I was back to needing to form the clay to look like fondant decoration for the flower.  This time I went straight to using the bottom of a mold to form the pieces on and without too much trouble ended up with what I thought would be an okay sized flower, baked it and then glued it in place on the cake.  And I have to say I am pretty happy with how it turned out.... .definitely pretty proud of myself for my very first 1:48 scale cake.


I also used the star tip to finish off the cupcakes that I had already made and were just waiting for their frosting.  I used the star tip to pipe little rosettes in yellow frosting, which turned out cute as well, so I just have to get another tray painted and glue them on and they will be done.


  I'll probably do at least 2 more batches of cupcakes for the bakery, I'm just not sure exactly how I want them to look ("flavor" of the cupcakes and color and technique for the frosting).  As of right this moment I have a bottom and a top tier already baked for a white square cake, so I have to figure out how I want to decorate that cake and then make some more cakes and decorate them.

I really really want to have some fancy cookies in the bakery as well, but I'm not sure how I'm going to accomplish that.  I made just round cookies for the Tea Room so I could do that again, but I really would like to have some cookies in fancy shapes...... I'm looking into the possibilities of a couple different possible options for that, so we'll see what I can come up with :)

Sunday, July 31, 2016

{Flutterby Bakery} Cafe Chairs

As promised...... A post with pictures!
Maybe not the most exciting of pictures (I mean I kind of think they are, but I guess it depends on what you are really in to whether or not chairs are exciting lol).  I was originally just planning on buying 3D printed little cafe chairs, but the more I looked at them the more I thought, I bet I could make these from wire. (Also I had seen a tutorial for making a table and chairs from wire for 1:12 scale, so that really got me thinking I should try it out myself).  I'm always torn with stuff whether to make it myself or buy it finished (or whether to make something from scratch or from a kit..... in that case kit usually wins so I don't have to do the math to scale stuff down and cut the pieces lol) I really love to be able to look at something and know that I actually made it myself (also it's usually cheaper to make myself), but also some things either aren't going to be worth the time and effort to make rather than buy or the homemade version doesn't turn out quite as crisp and clean looking as the purchased version.  In this case both of those things were factors I figured might come in to play, so I decided to try making just one and see how it turned out.

    I started by looking up the height and such of similar cafe chairs and determined that I would need my finished chair height to be .75". I also decided that .25" circle for the seat should be okay, which was easy because then I could just punch it out of heavy cardstock (actually I ended up using watercolor paper because it was the thickest thing I had around the house, but also I think it was a good idea because the moisture from the glue and paint is not going to affect it unless it gets awfully wet). I needed something a little more substantial to make the seat look right and not too thin though.  Fortunately I had just bought a package of different sizes of jump rings from Walmart the other day and one of the sizes was the perfect size to make the base of the seat out of.  I glued 2 jump rings together to get just the right look.


After making the first one I still wasn't 100% sure how I felt about it, but it was relatively easy to make and was cute so I thought it was worth making some more to see if I could do a couple things I wasn't completely happy about a little better (mainly getting the legs a little smoother and straighter and the seat needed to be a hair lower), after making the second one I decided I did like them enough to use and go ahead with making so I made a 3rd last night and will probably make a couple more today or this week.  For the actual construction, I have so far done it 3 different ways as I figured out what made it easier or didn't work as well, so I'll go through each way real quickly..... its basically the same steps, I just did them in different orders......

so..... for the first chair I made......
I started by bending a piece of wire to form the back of the chair and the back legs.  I brought several things to the work table with me to try bending it over because I wasn't sure what was going to be the right size, but this small screwdriver ended up being perfect, not only for this piece, but where it gets smaller near the tip worked perfectly for the smaller loop on the back (but I'll get to that in a minute lol)
I bent a much longer piece than I needed first and then after I had the arch measured the legs and cut them to length.  I found that a pair of toenail clippers worked fabulously for cutting the wire for this project.
Oh, also this is 24 gauge wire, probably should tell you that. lol.... so now back to making it..... 
After I had cut the legs to length I laid it down flat and put a couple dabs of glue on the legs where I wanted to seat to be and balanced a jump ring standing up on it and left it to dry.  (This is also where I realized that 2 jump rings would be better so I added another one.)
If I have one thing to say about making these (in any of the methods I used) it's to let the glue completely dry and set up, I really have patience issues so I often don't do this and then it makes it more difficult because I have to hold things together that should have already been set, but I'm sure it's so much easier of you let it completely dry first lol.  My next step this go around was to add the front legs, I bent a piece or wire so that the bent top fit inside the front of the jump rings, dipped it in glue and then stuck it in the jump rings
Because of how I did it this go around I ended up having to hold it like this until it was dry..... well I say until it was dry, actually I got tired of waiting and tried to cut the legs to length before it was dry and it ended up making the front legs and one of the back legs (because they also were not completely dry I don't think) come off so I had to try to add a few more dabs or glue and balance everything and get it lined back up properly and then keep it still until it dried......

    Once that was all dry I glued the paper I had punched out onto it for the seat, then glued the small loop into the back of the chair, by dipping the ends into tacky glue and attaching them to the edge of the back of the seat.  I laid the chair down on its back to do this so that the back was nice and flat and lined up properly {apparently I didn't take a picture of this though lol}.  Then I used some gloss white craft paint to paint the jump rings and the top of the seat.

For my second go around I had a couple of things I wanted to try doing differently to see if it made it any easier.  To start with I started by making the seat completely first...... gluing the 2 jump rings together and then gluing the seat on before I started putting the whole chair together.
Next I again formed the back and back legs piece and cut the legs to length, but I also made the front legs at the same time, measuring them to length (so I though) before gluing them to the seat.
Then I glued the front legs in place first with the seat sitting upside down (so that the legs were up in the air as they dried.

In this case I think I actually did let this dry completely before moving on, but that was probably only because I ended up having to leave the house for a while at this point lol.

Then I glued this whole assembly to the back piece.  By having the front legs already glued in place I was able to lay it on its side to dry on the back, which would have worked great, except that my front legs did need to be cut just a smidge shorter and I didn't let the back completely completely dry before I tried to do that so it came off a little bit and I had to re-glue it, but by then I was able to stand it up to dry and make sure all the angles were correct.
This time I painted the jump rings and paper seat before gluing the other back piece on, because the paint was a slightly different white than the wire and it's not really noticeable when they are just next to each other, but when I got some of the paint on the wire it was noticeable, and it was pretty much impossible not to get the paint on the inner back piece if it was already in place.  I let the paint dry and then glued the last piece in place the same as I did with the first one.

And then for the third one, rather than gluing the front legs in first with the seat laying upside down, I went back to gluing the seat to the back first (but with the seat already assembled like the second chair), with the back of the chair laying flat and then after that was dry (except it wasn't really) I glued the front legs in.  My thinking was that I would be able to stand it up to dry since the back was already attached and the top of the seat already in place, and perhaps if I had let the glue on the back completely dry and had has the front legs just the right length this would have worked, but I had to trim the legs slightly and the back wasn't completely set so of course, you guessed it, I had to reglue that so it ended up laying on it's side to dry again, which worked fine.  From there on I did  it the same as with the second one, painting first and then gluing on the inside back piece.  Over all I think this was probably the best way of doing it so when I make the last few I'll probably be doing it this way .......

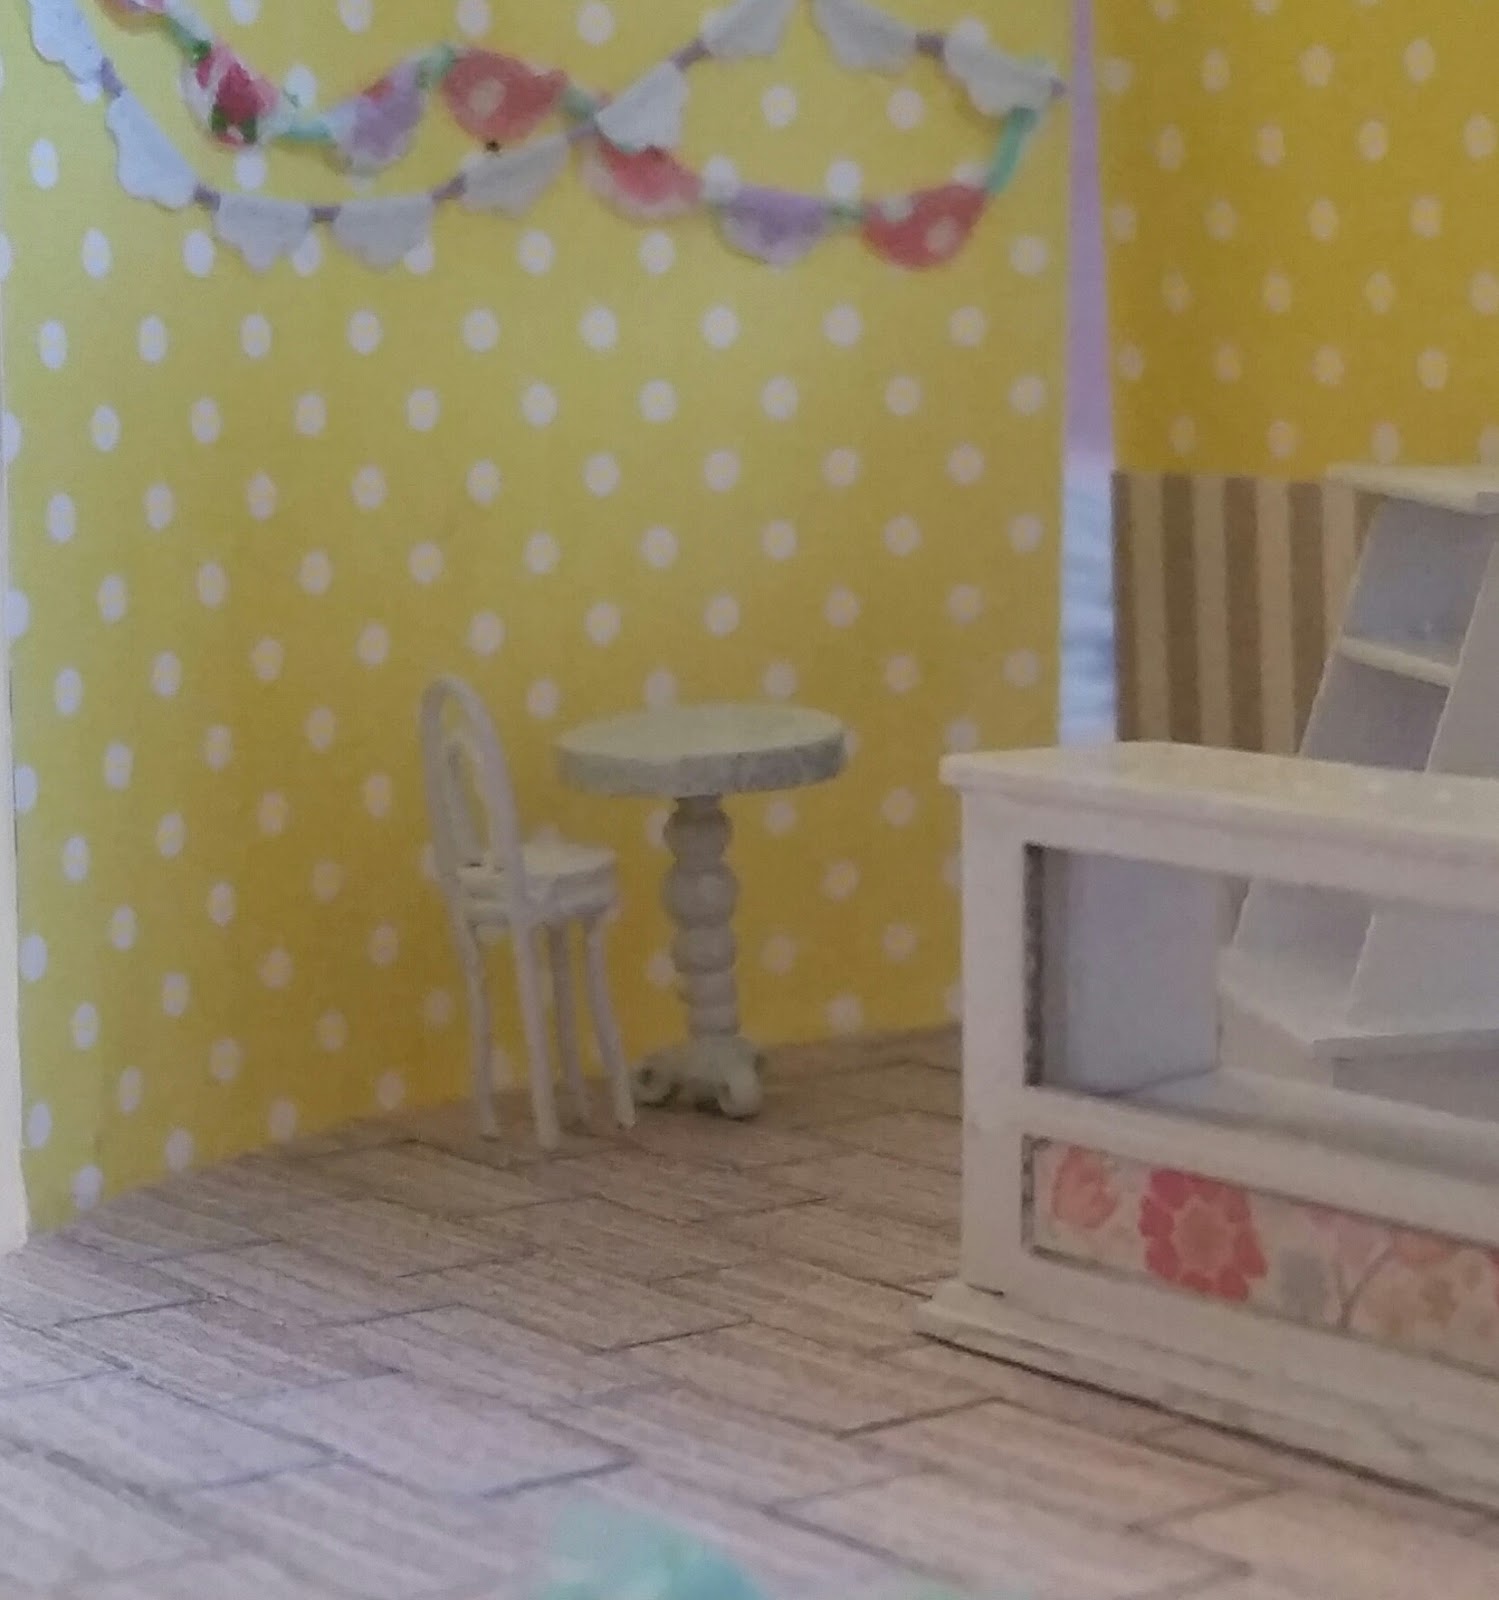
So , if you were a good enough sport to actually read through all that here's your reward {lol}..... a couple pictures of 2 of the chairs set up with the little table I made a while ago, sitting in front of the wall, where they will ultimately be in the bakery.