Well, it has been a while since I posted anything on here, and I must say since I've really gotten much of anything done for any of my current projects....... I'm hoping though, to make some real progress this weekend.... especially on the Backyard Art Studio and Flutterby Bakery. My Hubster is going to be out of town Saturday evening through probably Sunday evening, but I'm staying home because I have a bunch of stuff around the house that needs to get done, so I'm hoping to also get some miniature work done. My two main goals are to get some more painting done on the bricks for the Backyard Art Studio, and maybe start cutting the openings in the roof for the skylight windows, but I think this I might hold off on and have my husband do, or at least help with.... plus I still need 2 more windows and I won't be getting those probably until next week or later, so it's not like I could finish those off and get the structure together or anything lol. The other thing I really want to work on is Flutterby bakery..... I'll be making tiny little bunting banners for one of the walls, and then I'm hoping to get the floors finished off and maybe the table made and decorated for the view of the kitchen through the door in the wall. If I can get that stuff done then there is really very little left to do until I can finish that project (although I still need to order a few things to help with making all the baked goods for the display cases, so it'll be a little while before I can put it all together)
Soon I'll also be getting more into the conservatory in the terrarium I got with my birthday gift card and....... I kind of got another smaller one on clearance at Hobby Lobby the the other day.... soooo...... now I have 2 conservatories to do in different scales (the original one is 1:12, and the second one is about 1:24, but I actually got fairy garden furniture for it. I would post photos of it now, but my computer is being a turd face and not wanting to work properly, so I'll have to leave it at that for now, later this weekend I'll post updates on what I've actually managed to get done and hopefully post pictures then. :)
Friday, June 24, 2016

Friday, June 3, 2016
{Attic Roombox} finishing off one of the pieces of broken furniture....
Wow, it's been quite a while since I posted anything.... mainly because I haven't really worked on anything in a while because I haven't really had the time. I also haven't ordered the stuff I need to move ahead with my two main projects going on right now (the Flutterby Bakery and the Backyard Art Studio) so what I have done has just been a couple little things for the Attic. I'm really hoping to get back to the Backyard Art Studio soon and at least get the structure itself finished.... but more on that at the end of this post.....
Here's what I did the other night when I had a few minutes for the Attic.....
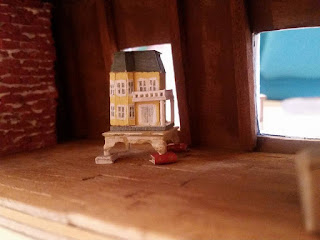
The table is one of the broken pieces that prompted this whole project, and it's just about the perfect size to sit the dollhouse on, so it was my quick project the other evening.....
Here's a reminder of what it looked like broken (this picture was taken right after I broke it, and you may notice that the legs were actually still a little longer then.... they broke a little more in storage... oops....)
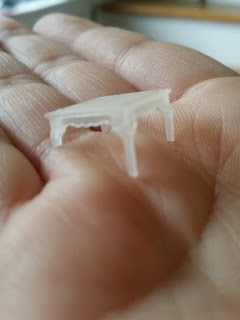
So, from that point to now... I painted a wood colored layer and then a white layer over it and distressed it, and then I made some little books to put under the shorter legs to even it out.
 The books are just little pieces of balsa wood with three sides painted white (or gold) for page edges and scrapbook paper glued around the outside as a cover and then a little gold paint for accents. I only made the three for the table right then, but I'm going to be making more so that there can be some stacked books up in the attic. I also found a scrapbook paper that is meant to look like brown leather, so I will make a few books out of that too and see how it looks.
I still have to age/verdigris a little more of the copper strip for the outside of the roof, and I'll make sure I take pictures of the steps/process so I can do a little tutorial on that, and also for making the rest of the books.... although I'm sure no one really needs a tutorial for that because it's pretty self explanatory, but sometimes it's nice to see exactly what someone else did before you try it yourself.....
But going back to the Backyard Art Studio and Flutterby Bakery..... I will probably be picking back up with the Art Studio next, for one because it's been a really long time since I've really worked on it and I don't want to lose too much momentum, but also because I'll have the materials I need for the next step of that sooner than I will for Flutterby Bakery. I was planning on ordering windows to use for the skylights in the studio and just kept not getting that done, but the other day in Hobby lobby I noticed that they had windows that will work (they aren't exactly the same but they are close enough) and then I don't have to pay shipping or wait for them to get here (and I still have some left on the gift card I got for my birthday so I can use that for them), and I think this week they are 30% off so I will probably go and get them sometime this afternoon/evening. I think I also need another sheet of the brick siding and then I have to do the paint finishes on them..... that's a good sit and do while I'm watching a movie activity. So the siding and the skylights I'm hoping to do pretty soon and then I think the structure will be ready to be put together.
I'm also dying to finish the Bakery, and while I need to order a few things to make more cakes/cupcakes/baked goods for the main room and either make or order the rest of the furniture (I plan to make the tables... I already made a test one, I just have to decide whether to try to make or just order chairs), I do need to make a table and decorate the "kitchen" that will be visible through the doorway and then I can probably go ahead and glue the floor down to the case and glue the wall in place and such.
I'd really like to have the Bakery and at least most of the Backyard Art Studio finished by some time in August (especially since I have a couple - hopefully - quick fall projects I want to do), but summer does tend to be pretty busy for me so IDK how much free time I'll have to work on stuff, lol. I guess I'll just have to devote my evenings to crafting... because you know {get ready for some sarcasm} that'll be such a hardship for me lol ;) ....

The table is one of the broken pieces that prompted this whole project, and it's just about the perfect size to sit the dollhouse on, so it was my quick project the other evening.....
Here's a reminder of what it looked like broken (this picture was taken right after I broke it, and you may notice that the legs were actually still a little longer then.... they broke a little more in storage... oops....)

So, from that point to now... I painted a wood colored layer and then a white layer over it and distressed it, and then I made some little books to put under the shorter legs to even it out.

I still have to age/verdigris a little more of the copper strip for the outside of the roof, and I'll make sure I take pictures of the steps/process so I can do a little tutorial on that, and also for making the rest of the books.... although I'm sure no one really needs a tutorial for that because it's pretty self explanatory, but sometimes it's nice to see exactly what someone else did before you try it yourself.....
But going back to the Backyard Art Studio and Flutterby Bakery..... I will probably be picking back up with the Art Studio next, for one because it's been a really long time since I've really worked on it and I don't want to lose too much momentum, but also because I'll have the materials I need for the next step of that sooner than I will for Flutterby Bakery. I was planning on ordering windows to use for the skylights in the studio and just kept not getting that done, but the other day in Hobby lobby I noticed that they had windows that will work (they aren't exactly the same but they are close enough) and then I don't have to pay shipping or wait for them to get here (and I still have some left on the gift card I got for my birthday so I can use that for them), and I think this week they are 30% off so I will probably go and get them sometime this afternoon/evening. I think I also need another sheet of the brick siding and then I have to do the paint finishes on them..... that's a good sit and do while I'm watching a movie activity. So the siding and the skylights I'm hoping to do pretty soon and then I think the structure will be ready to be put together.
I'm also dying to finish the Bakery, and while I need to order a few things to make more cakes/cupcakes/baked goods for the main room and either make or order the rest of the furniture (I plan to make the tables... I already made a test one, I just have to decide whether to try to make or just order chairs), I do need to make a table and decorate the "kitchen" that will be visible through the doorway and then I can probably go ahead and glue the floor down to the case and glue the wall in place and such.
I'd really like to have the Bakery and at least most of the Backyard Art Studio finished by some time in August (especially since I have a couple - hopefully - quick fall projects I want to do), but summer does tend to be pretty busy for me so IDK how much free time I'll have to work on stuff, lol. I guess I'll just have to devote my evenings to crafting... because you know {get ready for some sarcasm} that'll be such a hardship for me lol ;) ....
Friday, May 20, 2016
Another new project (hehe)
Yes! two posts in one day! lol I thought about just tacking this on at the end of the other post but decided it probably deserved it's own. as well as getting the cardstock at hobby Lobby yesterday I also used some of the gift card my sister gave me for my birthday and got something else I saw there a while ago and have been wanting ......

 The furniture that's in it isn't from Hobby Lobby though.... just the structure..... it's supposed to be a terrarium I think, but I saw it and thought with the solid glass top and back that it would be PREFECT for a dollhouse sun room. And it just so happens that I'd been wanting to do one of those anyway. I already have a "wicker" bed and desk from when I was a kid, but then I found this table and bookcase at a Goodwill store sometime last year, and wanted to do a room box with them. So...... even though I have a tone of other projects going on right now...... lol. I'm not necessarily planning on putting a lot of effort into this one at the moment though.... I'll keep my eye out for neat pieces for it (especially if I find them at places like Goodwill), but at least until I get the Backyard Art Studio and Flutterby Bakery done (and maybe even the Attic), it will probably just sit on a shelf..... but still I'm excited about it ;)


{Attic Roombox} outside (almost) finished
I swear that something is conspiring against me ever getting any housework done. I had a whole day free again yesterday, in which I planned to run a couple errands in the morning, then get the 2 folding tables that are in the living room right now (still up from Easter..... yep, you read that right) cleared off and out of here and maybe even get enough of our back room (which is meant to be an extra living room/family room/office/library/guest room room, but is currently a storage room) cleared out enough to get the bookcase I got the other day for it in there and get a bunch of stuff put away on it. (Said bookcase is also currently in the living room, or rather the door from the hallway to the living room..... It would really be nice to get my living room back to just a living room lol). But, my sinuses apparently didn't want to go for that plan because they were killing me yesterday (from allergies I'm sure) and making me feel all droopy and tired and even making my face kind of hurt, especailly if I moved around too much, so by the time I ran a couple errands (Hobby Lobby, And That!, and Wegmans) I was like, bleh, I don't feel like I can do anything else today. So of course there's still 2 tables and a bookcase in my living room that don't belong..... I did at least get some other stiff a little picked up, but really not enough to speak of.
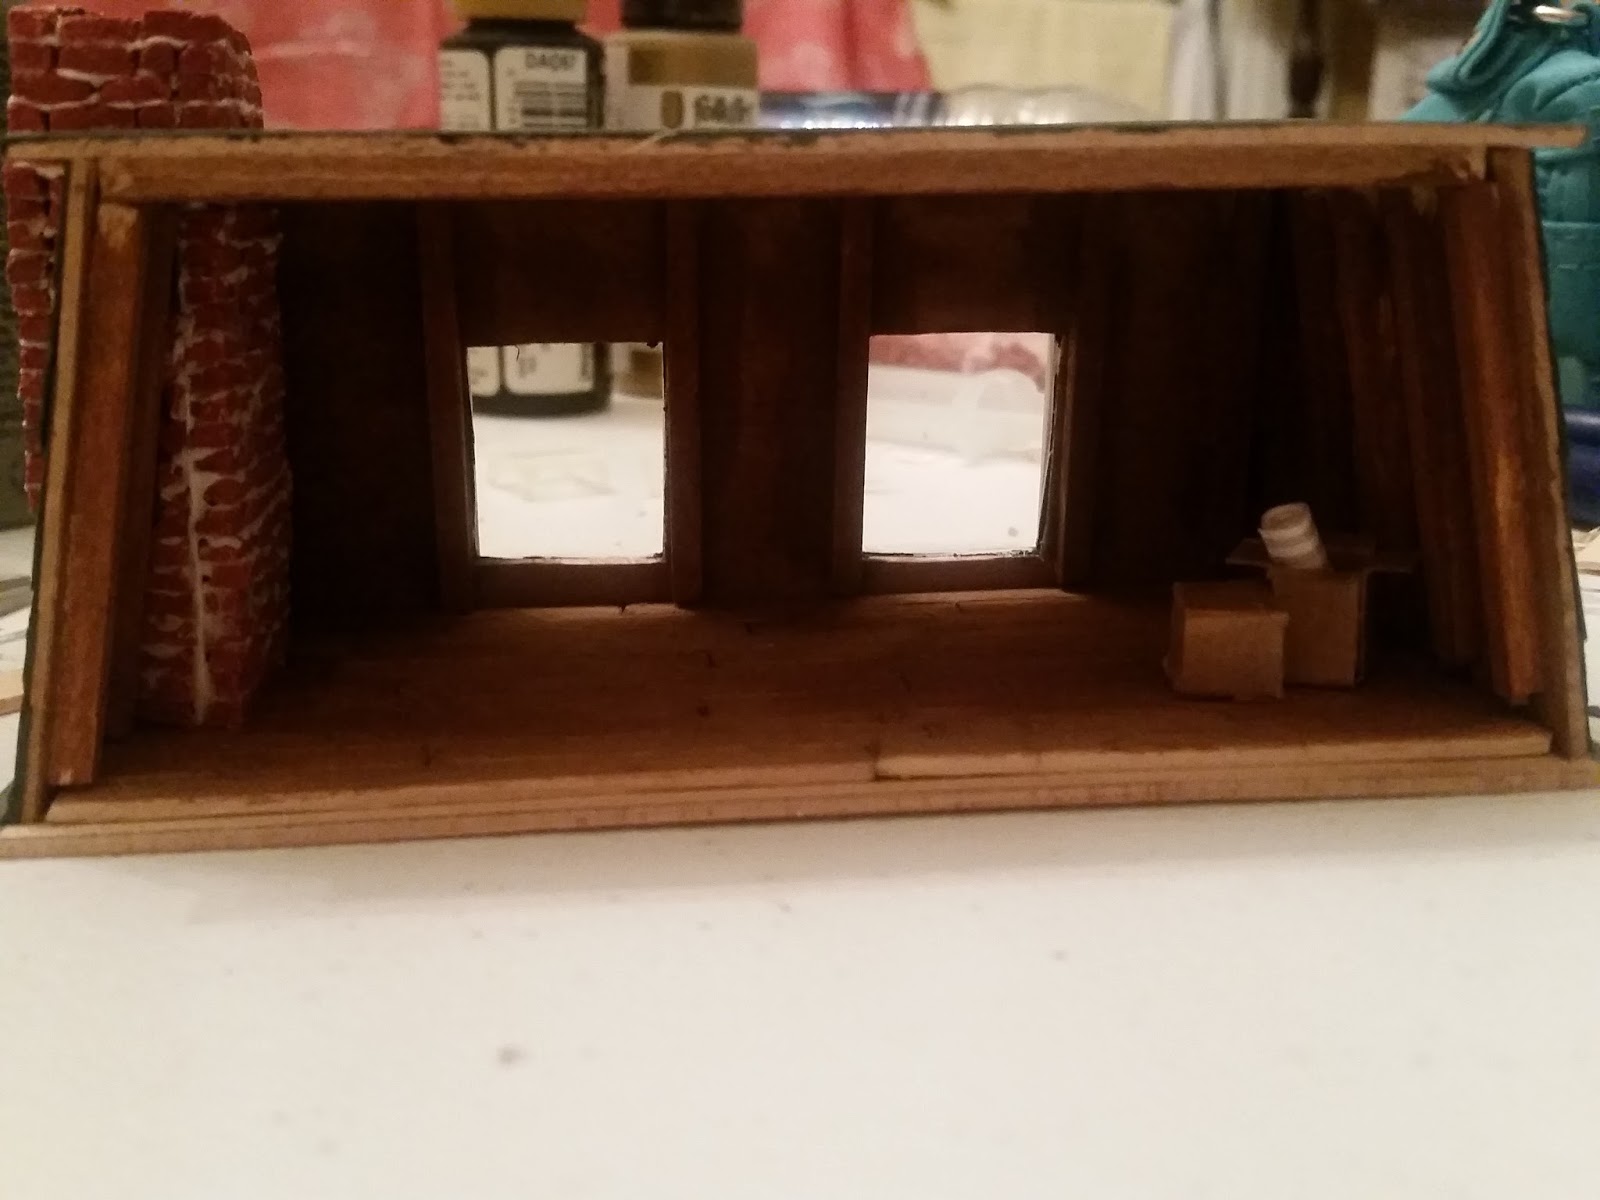
But, since I didn't feel like doing anything but sit around yesterday afternoon, I decided to go ahead and finish the outside of the Attic roombox and that way it's just ready to put stuff in as I break stuff or come up with extra pieces lol. Also one of the things I had gone to Hobby Lobby for that morning was gray cardstock to make the "slate" shingles for the roof from. And again I forgot to take in progress pictures (I blame my allergies making me groggy lol), but it was pretty straight forward.... I had finished up the chimney the night before, so all I had to do was the roofing and dormers. I cut the shingles from dark gray cardstock and glued them on, then trimmed the excess off at the corners and around the window openings. Then I used a stencilling brush with a slightly lighter gray paint (I swirled the brush on a paper towel first until there was hardly any paint left on it) and swirled that randomly over the whole surface to give it some texture and depth of color. The little dormers are cut from Balsa and glued on and painted white and the top (flat) part of the roof I painted with black paint and then painted over with the gray I used on the shingles. I still have to do roofs and the actual windows for the dormers and maybe flashing on the corners of the roof and around the chimney, but right now I have a little test strip of some thin copper tape sitting with salt and vinegar on it to try verdigris-ing it to possibly use for all that stuff (well not the windows, but the dormer roofs and flashings) If it works out well I'll do a little tutorial on it when I do the rest of it. But without further adieu here's some pictures of it at this point......


But, since I didn't feel like doing anything but sit around yesterday afternoon, I decided to go ahead and finish the outside of the Attic roombox and that way it's just ready to put stuff in as I break stuff or come up with extra pieces lol. Also one of the things I had gone to Hobby Lobby for that morning was gray cardstock to make the "slate" shingles for the roof from. And again I forgot to take in progress pictures (I blame my allergies making me groggy lol), but it was pretty straight forward.... I had finished up the chimney the night before, so all I had to do was the roofing and dormers. I cut the shingles from dark gray cardstock and glued them on, then trimmed the excess off at the corners and around the window openings. Then I used a stencilling brush with a slightly lighter gray paint (I swirled the brush on a paper towel first until there was hardly any paint left on it) and swirled that randomly over the whole surface to give it some texture and depth of color. The little dormers are cut from Balsa and glued on and painted white and the top (flat) part of the roof I painted with black paint and then painted over with the gray I used on the shingles. I still have to do roofs and the actual windows for the dormers and maybe flashing on the corners of the roof and around the chimney, but right now I have a little test strip of some thin copper tape sitting with salt and vinegar on it to try verdigris-ing it to possibly use for all that stuff (well not the windows, but the dormer roofs and flashings) If it works out well I'll do a little tutorial on it when I do the rest of it. But without further adieu here's some pictures of it at this point......



Tuesday, May 17, 2016
{Attic Roombox} a tiny little test project
I was babysitting today, but while the little one was napping I decided to try making a trial "cardboard" box for the Attic since I'll need several, both closed boxes and open boxes with stuff peeking out. I actually made two boxes using different techniques, but the first one was probably a little big for this project so I didn't end up taking a picture of that one. But I did take a quick pic of the second one


.... {Igore the mess in the background... as I said babysitting lol}
Keeping with the theme of using leftovers for this project I made this box out of the rest of the piece of craft paper that I cut the shingles for the North Pole Tea Room from.
I'll post more pictures and some in progress pics or maybe a little tutorial or template for it when I make more
Monday, May 16, 2016
{Attic Roombox} An Itty Bitty dollhouse and using up some leftovers...
Okay........ So.......... once again I should have been getting some housework done today, but as I started clearing off the table I had in the living room with everything I had been working on, on Flutterby Bakery and the beginnings of the Attic Roombox, I just couldn't help myself, and rather than continuing my straightening up I started working on a piece for the Attic. An itty bitty {aprox.} 1:576 scale dollhouse. This was one of the items I really wanted to make to put in the Attic along with all my broken and surplus lovelies. But also I was a little unsure, because it is really small. I didn't really do a whole lot of planning on this.... I had a general idea of how wide I wanted to make the house and it's style and then just kind of eyeballed everything from there.
I started with the basic structure... which went a lot smoother than I expected it to with having the bay on the front and all. LOL


I also put a floor dividing the two stories inside the house. At this point it was mainly just to square up and strengthen the walls, but I'm considering going ahead and putting another floor in to separate the 2 story and attic and a couple walls and paint and/or wallpaper the rooms, but I'll only do all that if I put it in the Attic positioned so that you can see the back of it either through one of the windows or reflected in a mirror or something.
Next came a base/floor for the house and wrap around porch. Before I could attach the wrap around piece to make the ceiling of the first floor porch and floor of the second floor balcony I needed to paint the house. In keeping with the goal of having this project use materials I already have, I decided to paint it the yellow that I'm using on the doors of the Backyard Art Studio.

At this point I really got into it and kind of forgot to take in progress pictures, but I painted windows on the bay and doors and windows on the flat part of the house front and glued on the wrap around piece for the top portion of the porch/balcony

Then came time to do the roof (which again I forgot to take pics of until it was completed) I opted for a mansard roof, with the bay having it's own turret roof. I made roofs out of little scraps of Bristol paper I had laying around. The main roof went pretty quickly and easily, the turret roof was a little bit more tricky, mainly because of how tiny the pieces were, but it could have been worse, I'm sure. Haha. Once I had it all glued together and glued onto the house I painted it gray to mimic slate.

It's really starting to look like a dollhouse! to finish it off I put some posts in the corners of the porch and made a railing for the second story balcony. Now let me tell you.... this balcony railing was tiny. And I really almost didn't even try to make a railing for it, but it actually ended up being easier to do than I expected. I just cut it from the came scrap of Bristol that I used for the roof using a craft knife.

And then glued it on around the edge, and Voila! the dollhouse is finished. (at least until I decide whether or not to do anything with the inside)


I have to say, I'm quite proud of myself for this one!
And then because there was still a little time left of the day before I had to go pick my husband up from work, and I knew the day was a bust for housework, I went ahead and got started on the chimney for the Attic, using up leftover bricks from when I made the steps for the Teapot Tea Room.

 I got the part for inside the Attic done....
 And got started on the part on the outside of the structure.
So, maybe tomorrow I'll actually get some housework done...............
I started with the basic structure... which went a lot smoother than I expected it to with having the bay on the front and all. LOL


I also put a floor dividing the two stories inside the house. At this point it was mainly just to square up and strengthen the walls, but I'm considering going ahead and putting another floor in to separate the 2 story and attic and a couple walls and paint and/or wallpaper the rooms, but I'll only do all that if I put it in the Attic positioned so that you can see the back of it either through one of the windows or reflected in a mirror or something.
Next came a base/floor for the house and wrap around porch. Before I could attach the wrap around piece to make the ceiling of the first floor porch and floor of the second floor balcony I needed to paint the house. In keeping with the goal of having this project use materials I already have, I decided to paint it the yellow that I'm using on the doors of the Backyard Art Studio.

At this point I really got into it and kind of forgot to take in progress pictures, but I painted windows on the bay and doors and windows on the flat part of the house front and glued on the wrap around piece for the top portion of the porch/balcony

Then came time to do the roof (which again I forgot to take pics of until it was completed) I opted for a mansard roof, with the bay having it's own turret roof. I made roofs out of little scraps of Bristol paper I had laying around. The main roof went pretty quickly and easily, the turret roof was a little bit more tricky, mainly because of how tiny the pieces were, but it could have been worse, I'm sure. Haha. Once I had it all glued together and glued onto the house I painted it gray to mimic slate.

It's really starting to look like a dollhouse! to finish it off I put some posts in the corners of the porch and made a railing for the second story balcony. Now let me tell you.... this balcony railing was tiny. And I really almost didn't even try to make a railing for it, but it actually ended up being easier to do than I expected. I just cut it from the came scrap of Bristol that I used for the roof using a craft knife.

And then glued it on around the edge, and Voila! the dollhouse is finished. (at least until I decide whether or not to do anything with the inside)


I have to say, I'm quite proud of myself for this one!
And then because there was still a little time left of the day before I had to go pick my husband up from work, and I knew the day was a bust for housework, I went ahead and got started on the chimney for the Attic, using up leftover bricks from when I made the steps for the Teapot Tea Room.


So, maybe tomorrow I'll actually get some housework done...............
Tuesday, May 10, 2016
{Backyard Art Studio} first piece of artwork
This past week was kind of a busy one and by the time Saturday rolled around, between all the rain and pollen and everything I wasn't sick per say, but I wasn't feeling the greatest either and so even though I had a ton of housework to do, I sat down with my pastels and drawing board to do a little art instead. I was originally planning on working on a piece that I'd been wanting to do for a week or two now for real life. It is a scene I saw one night heading home (or somewhere anyway) from my parent's house, looking from driving over one bridge down the Rappahannock River towards the railroad bridge at sunset. The sky had a peachy/pinky glow and the river was reflecting it back and the bridge and trees along the shoreline were almost completely dark in silhouette. I would have liked to have gotten a photo of it to work from, but like I said... driving across the bridge.... couldn't really just stop in the middle of the road.

Once I was finished with the real life one though I thought it might make a good piece of dollhouse art as well. For the miniature version I did 1"x1" so it's much larger piece in dollhouse world than in real life (the original is 2.5"x2.5"), but I wasn't about to try to get it that small in 1:12 scale lol! I was debating whether I wanted this to be a finished piece of art in the Studio or have it be a WIP, but I had a little white frame that worked nicely with it so I went ahead and made it a finished piece.

I actually really like how it looks in its little itty bitty chunky frame. I don't want to do too many that are too much alike/framed the same for the Backyard Art Studio but I do have some more frames in different shapes in this teeny size, so I'm thinking about doing a whole series of teeny tiny art just for somewhere in my real life house (although I may do one or two of them for the Town House Dollhouse in a Dresser). I'm sure I have some little corner or area of wall somewhere that a grouped collection of tinsy art would look good in my house. If I do them I'll post pictures of them on the blog even though they won't be strictly speaking dollhouse related (but they will be dollhouse sized and miniature..... lol)
Subscribe to:
Posts (Atom)