I started working on painting the "mortar" on the one brick wall last night, but it was getting kind of tedious and I was getting tired when I was trying to work on it so I only did part of it...... I didn't take any pictures of the progress though because I didn't think it was probably something you could see well enough in a picture..... it really does finish it off nicely though in person so I will be doing it to the whole thing, but sometime when I'm more in the mood for it. lol
In the meantime, since I had only bought one sheet of the brick initially, just to try it out, and I got it from Hobby Lobby and today is Sunday, and Hobby Lobby isn't open on Sundays I wasn't able to get more to do the other 2 walls that I need to do I decided to get working on the floor for the patio/porch. I had already decided I wanted it to have a slate/flagstone tile floor, and I had seen an embossed paper meant for dollhouses that I thought would look good, but it was $8.99 for 3 sheets (plus shipping) and I would have only needed not even one whole sheet. I decided to use a trick I've done before and headed to Home Depot. I don't remember where I first heard this tip, but I've done it several times and it works out really well. In the flooring department they have a pretty good selection of peel and stick tiles..... which are easily cut into smaller, dollhouse sized tiles! And you can usually buy individual tiles for $1 or less each and not have to buy a whole box. So I found some slate looking ones and bought a couple tiles for a grand total of less than $3.00.
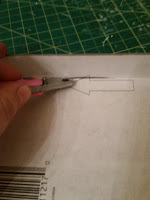
These tiles are super easy to cut. Just score the top of the tile along a straight edge, then snap it back and flip it over and run your blade along the crease in the back to separate it. (if for some reason you need to cut a piece that already has the paper backing off sometimes just snapping it back completely separates it)
Of course I dry-fitted the pieces before sticking them down, but I actually tried it two different ways before I settled on the pattern I wanted. I had started by cutting .75 inch pieces thinking I was going to do the whole area in that size tiles
But then I thought it might be a little small so I cut some pieces in 1 inch size (I know such a huge difference huh? lol), but I wasn't sure it was really that much better, plus like the .75 inch pieces it wasn't going to fit very evenly on the space, plus I didn't want to waste the pieces I had already cut so I tried alternating rows of smaller tiles and bigger tiles
It not only made the fit a bit better, but it also made it so the tiles didn't line up quite as much.... I don't know if you can tell in the picture, but with all the tiles the same size, they just seemed a little too "lined up" in rows. So I decided to go with the mix of sizes.
The beauty of these guys is that they already have adhesive on the back, so once I had laid it all out the way I wanted it I just peeled the paper off the back of each piece and stuck it down
Once it was all in place I trimmed off the pieces hanging over the edge (just scored the top and snapped the excess off) and cut some small pieces to fill in to the edges on the rows that had a little extra space, so that it was all nice and even
Now I do still have another step - grouting the tiles - but I forgot to get grout. For this project I didn't want a lot of grout between the tiles so I set them pretty close together, but they still need some.
And even with the cost of grout considered it's still going to end up being a cheaper way to do the area than buying the dollhouse embossed paper would have been - plus I feel like the tiles have a little more the real texture of the real thing.
P.S. sorry for the crappy photos, but it's night and the lighting in my living room where I was working on this isn't great, but I'll be getting better picture of the finished project as I finish different parts of the structure :)


No comments:
Post a Comment